Monthly Archives: September 2012

New intake manifold

I said that I wasn’t really going to do anything more to this motor and I lied.  I picked up a used LS6 intake from a member on LS1Tech last weekend and it arrived today.  Took a couple of hours this afternoon and made the swap along with cleaning up alot of the gunk that was built up on the throttle body.

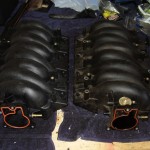
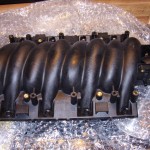
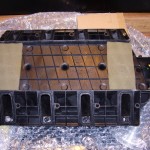
Here is a couple shots of the LS6 intake.  For being used it looks surprisingly new.  I believe the guy I bought it from said it was taken off shortly after the car it came on was purchased.  Most likely one of the C5 Z06 vettes or an end of line 01-02 F-Body.

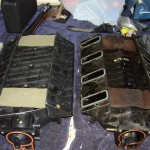
Here is a side by side comparison of the two intakes from the top.  As you can see they are nearly identical with the exception that the LS6 is missing the provision for the EGR system.  I had already removed this from my car in the spring and had it capped off on the LS1 intake.

Here is a comparison from the bottom.  This is where you can tell by visual inspection which is which since there actually were some LS6 intakes from SLP that did have EGR.  The LS6 has a flat bottom where the LS1 has a rise in the middle.  This is also mirrored on the inside of the intake with the LS6 being flat and the LS1 having a hump.  This simple redesign in the intake allowed it to flow air so much better and gave gains of around 10 rwhp on a relatively stock car.  With a cam, better flowing heads, and an opened exhaust the gains are a good bit more but vary with cam.

All I am really missing to finish out this motor before building a replacement are some better heads.  I will not go all out and get anything ported/valved as there is no point in putting a ton of money into nice heads.  But if I find a decent set of stock 243 as cast for a good price I’ll probably pick them up and swap them on since they would flow a great deal better than my 853s and net me another 15 or so rwhp.  No rush on that however since I just had my heads off 3 weeks ago and have no desire to do it again so soon.
 

Cam Swap – Completed

So I finished putting everything back together tonight.  The exhaust was fussy as usual but I was fed up at that point and forced it where I wanted it.  I’ll readjust it later.  It also started to over heat pretty good on the first start after a while.  It took about 3 hours of squeezing hoses and slowly adding more coolant in but I was able to take it for about a 15 minute drive without any further overheating issues.  The problem now is that it simply doesn’t want to stay running when in gear with the new cam.  Tomorrow I will play around with HPTuners and probably just raise the idle RPM by 100-150 to see if that will band-aid it good enough until I have the time to sit down and do a proper tune on it.

Here is a video of the first start.


Cam Swap – Day 7 and a half

Ok, so I lied to myself.  I chilled for a little bit, had a cup of coffee and decided to do some more work.  Ended up re-installing the other head, intake manifold, PCV system, and one set of rocker arms.  This time I really am kaput.

Maybe I won’t crash all night and can get up and wrap this thing up.  Just need to install the other set of rockers, make sure the engine turns over by hand with no obvious issues, put in the UD pulley, water pump and radiator then see if it will start without blowing the motor up.

Cam Swap – Day 7

So I spent an entire day with degreaser, brake cleaner, an ice scraper and razor blades trying to get the block deck and head surfaces as clean as possible.  The person who thought it was a good idea to move away from MLS gaskets and use graphite should be beat.  Badly.  It was a very boring and tedious day but one head is now back on.

Changing the oil pressure sending unit was more challenging that it appeared.  While it’s nut is 1-1/16 in size it was designed so that none of my 12 point sockets would actually catch on it.  In addition is was longer than any of my sockets were deep.  Turns out you need a special super deep socket just to change this unit.  At this point all the auto stores were closed and I really didn’t feel like buying a specialty socket that costs nearly as much as the sensor itself.  The nut on the sensor is also so shallow that it sits below the edge of the valley cover.  So I said to hell with it.  The valley cover was the only top end piece that was still on so I figured why now complete the job.  So I yanked the knock sensors and their harness and pulled the valley cover.  Grabbed a crescent wrench and swapped the sending unit.  Special socket?  I don’t need no stinkin’ special sockets!  One of the knock sensors was also a bit corroded but since it isn’t throwing any codes at this point I am not going to worry about it.

You really need to be a two ton gorilla in order to torque these head bolts down.  It’s especially not all that easy when you have the header flange flopping around getting in your way.  There was one bolt I just couldn’t get to torque, it ended up about a third of a turn short of where it needs to be.  I am thinking it should be ok though.  I’m more worried about having cleaned the surface well enough for the new gasket to seal properly.  After digging this deep and seeing some of the parts, it really needs to be rebuilt but I don’t have months to get that done and be without a car.  I will probably start coming up with plans to build or buy a forged stroker or move up to a larger cube motor.

I think I am going to call it a day for now and hopefully get some good progress done on it later in the day.

Cam Swap – Day 6

Took a few days off due to the crappy weather and having to wait for FedEx to deliver some parts for the heads.  They brought one package on Wed when the weather was the worst but got lame and wouldn’t deliver the other package on Thurs.  But they finally brought the items today and now I have everything to start putting the car back together.

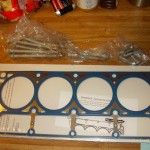
Here are the new Victor Reinz MLS head gaskets I will be using instead of the crappy graphite ones GM uses.  Also the new oil pressure sending unit and the oem TTY head bolts.

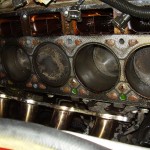
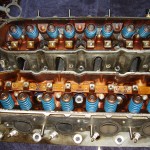
Here is a shot of the passenger side cylinder bank after pulling the head.  It has even more carbon build up than the driver side and the gasket is rotted through where it was supposed to block the coolant channels.  I am hoping these new gaskets will help to stem some of the oil being where it shouldn’t be issues.  A good tune once I get everything back together will be in order as well.  But that’s a whole other ordeal with learning HPTuners.

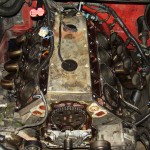
Here is a quick shot of the LS1 block with the entire top end removed.  Probably not a state that many would ever care to see their engine in.

Once the heads were out of the car is was cake to swap the springs.  Probably less than an hour to do all 16.  Whoever said that doing this while the heads are on the car is a simple job is a masochist, plan and simple.  Any major work in the future will see the engine removed completely.  This has at least doubled the time it should have taken me to get this all done trying to most of the work with the parts still in the car.

Tomorrow I should be able to start cleaning up the block and heads to remove all the gunk and old gasket material then start re-assembling.