Monthly Archives: January 2014

Driveline Swap in Progress – Day 3

So yesterday I managed to score getting off work a little early and thought that I would be able to make some progress on the swap project.  As usual, I was wrong.  Spent several hours working in the garage and hardly accomplished anything at all.

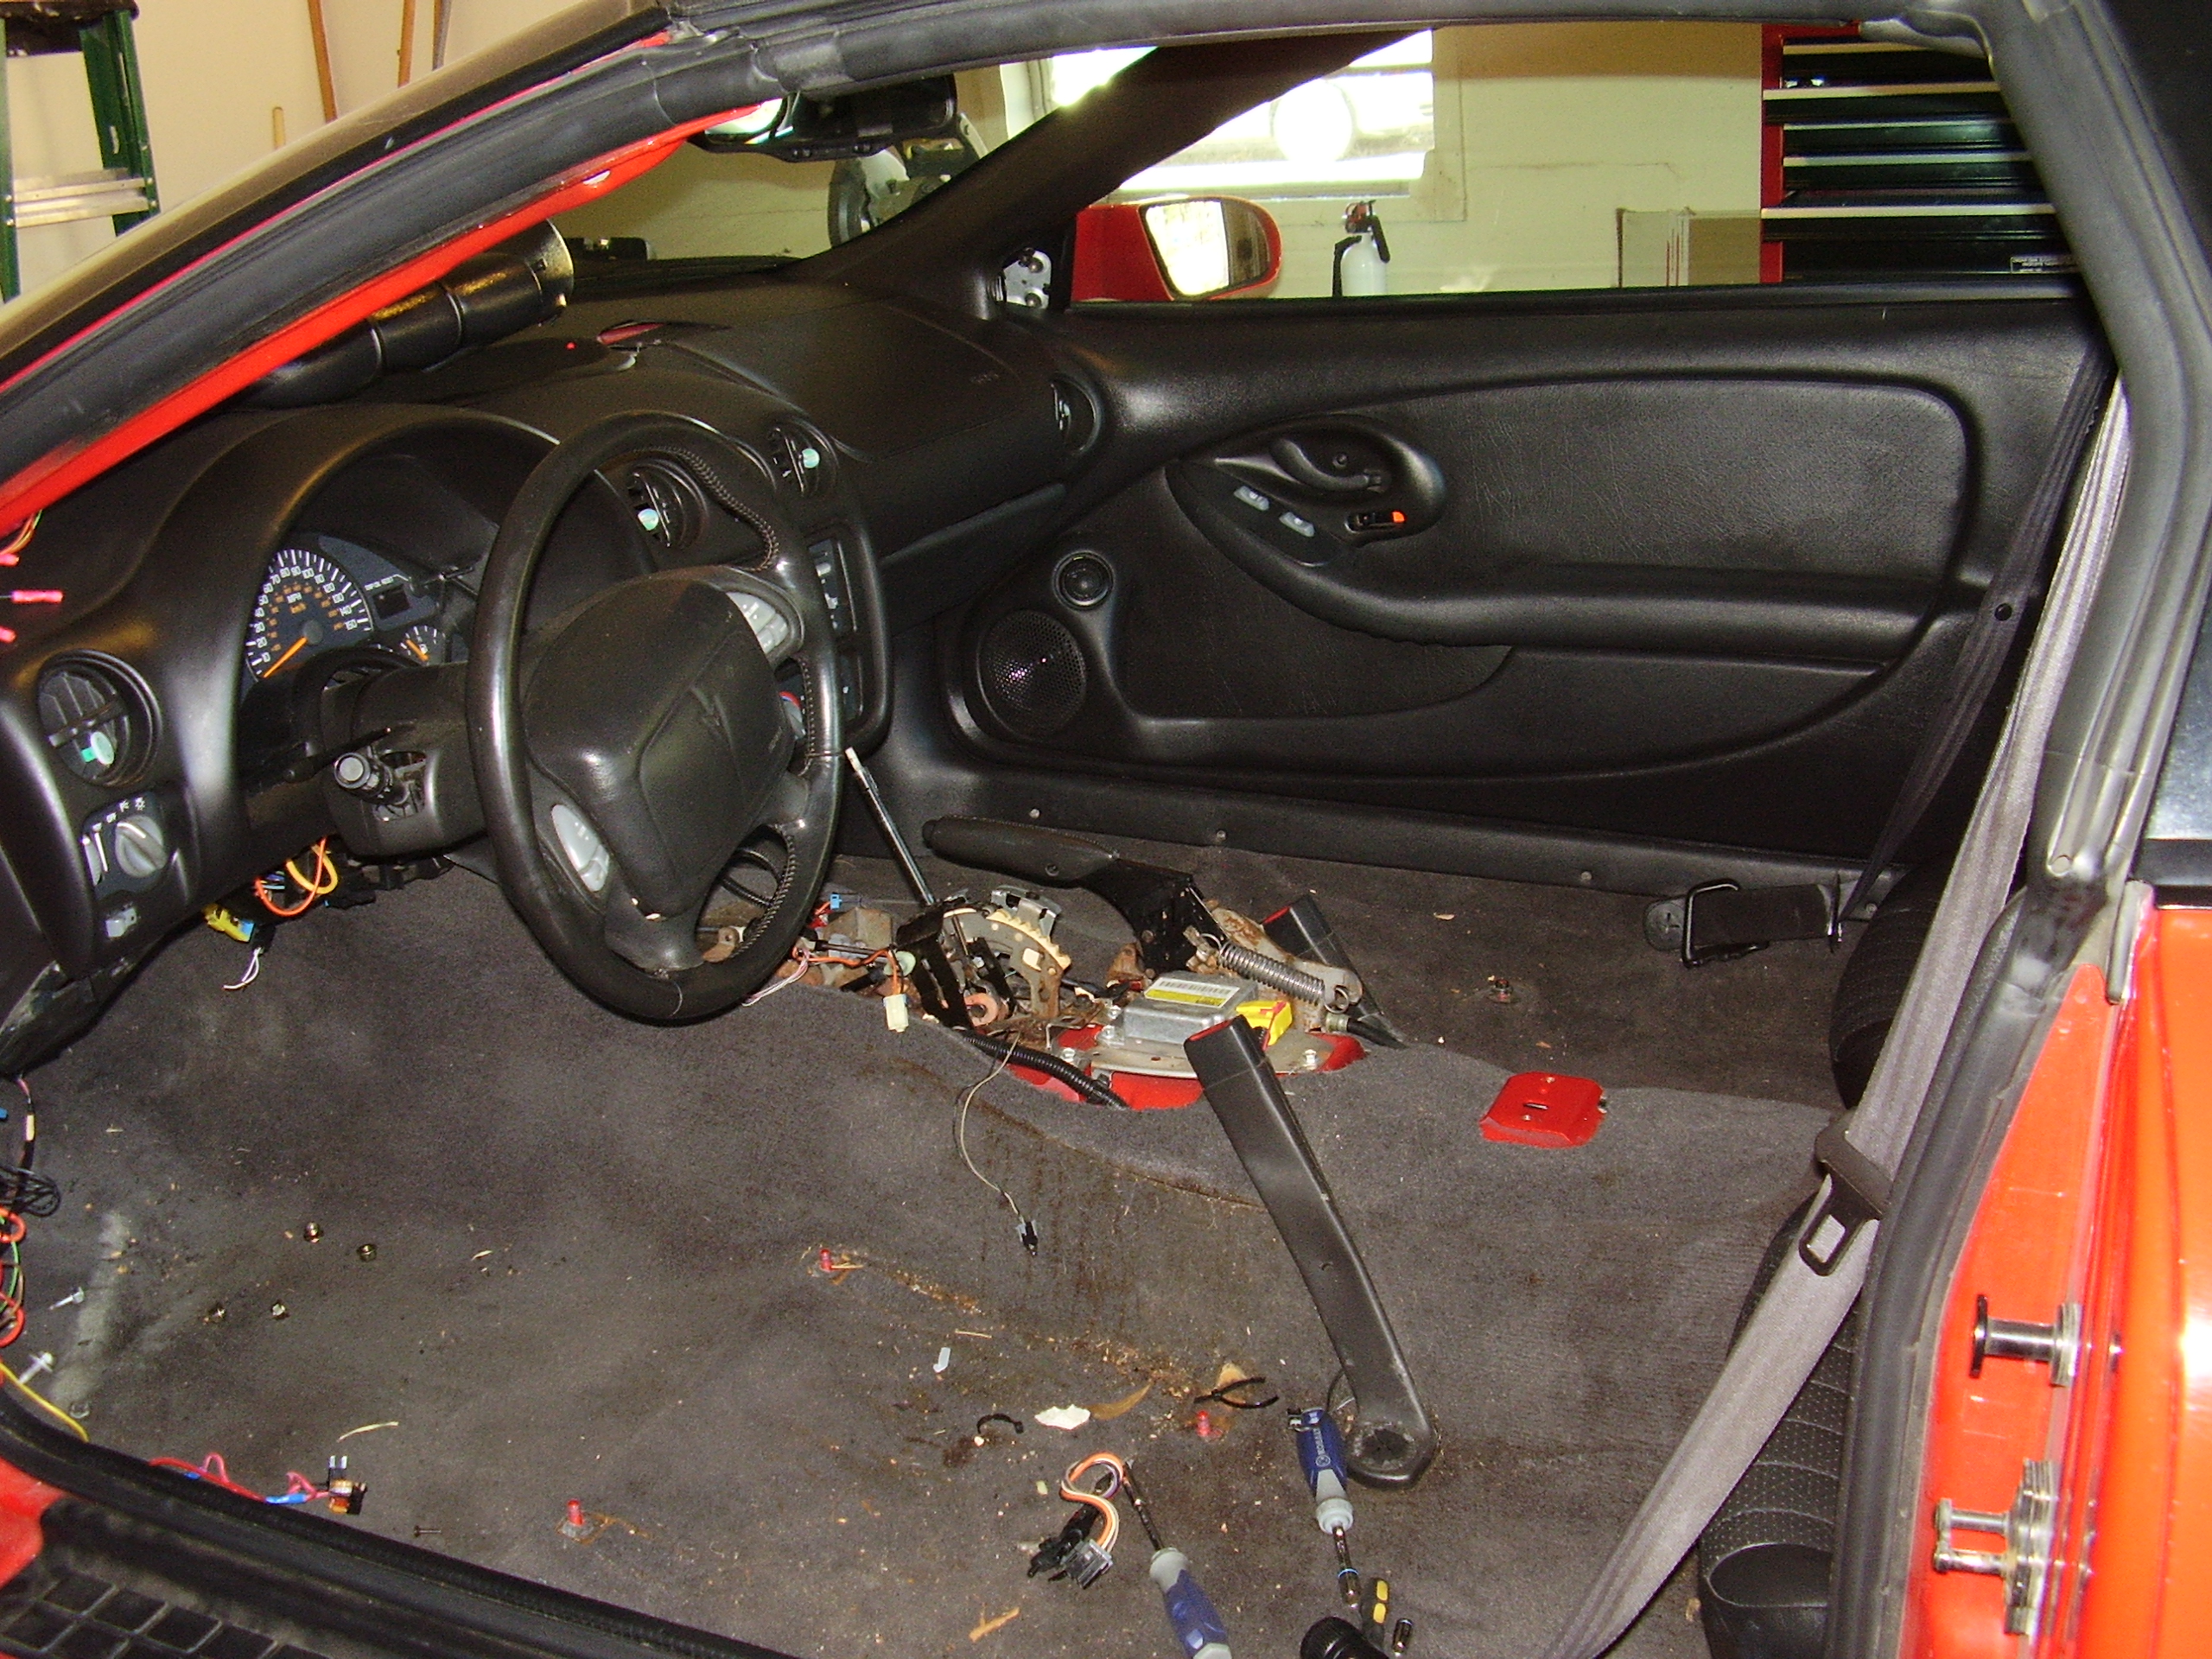
First up was getting rid of the A4 shifter assembly.  Just look at that mess.

A4 Shifter Assembly


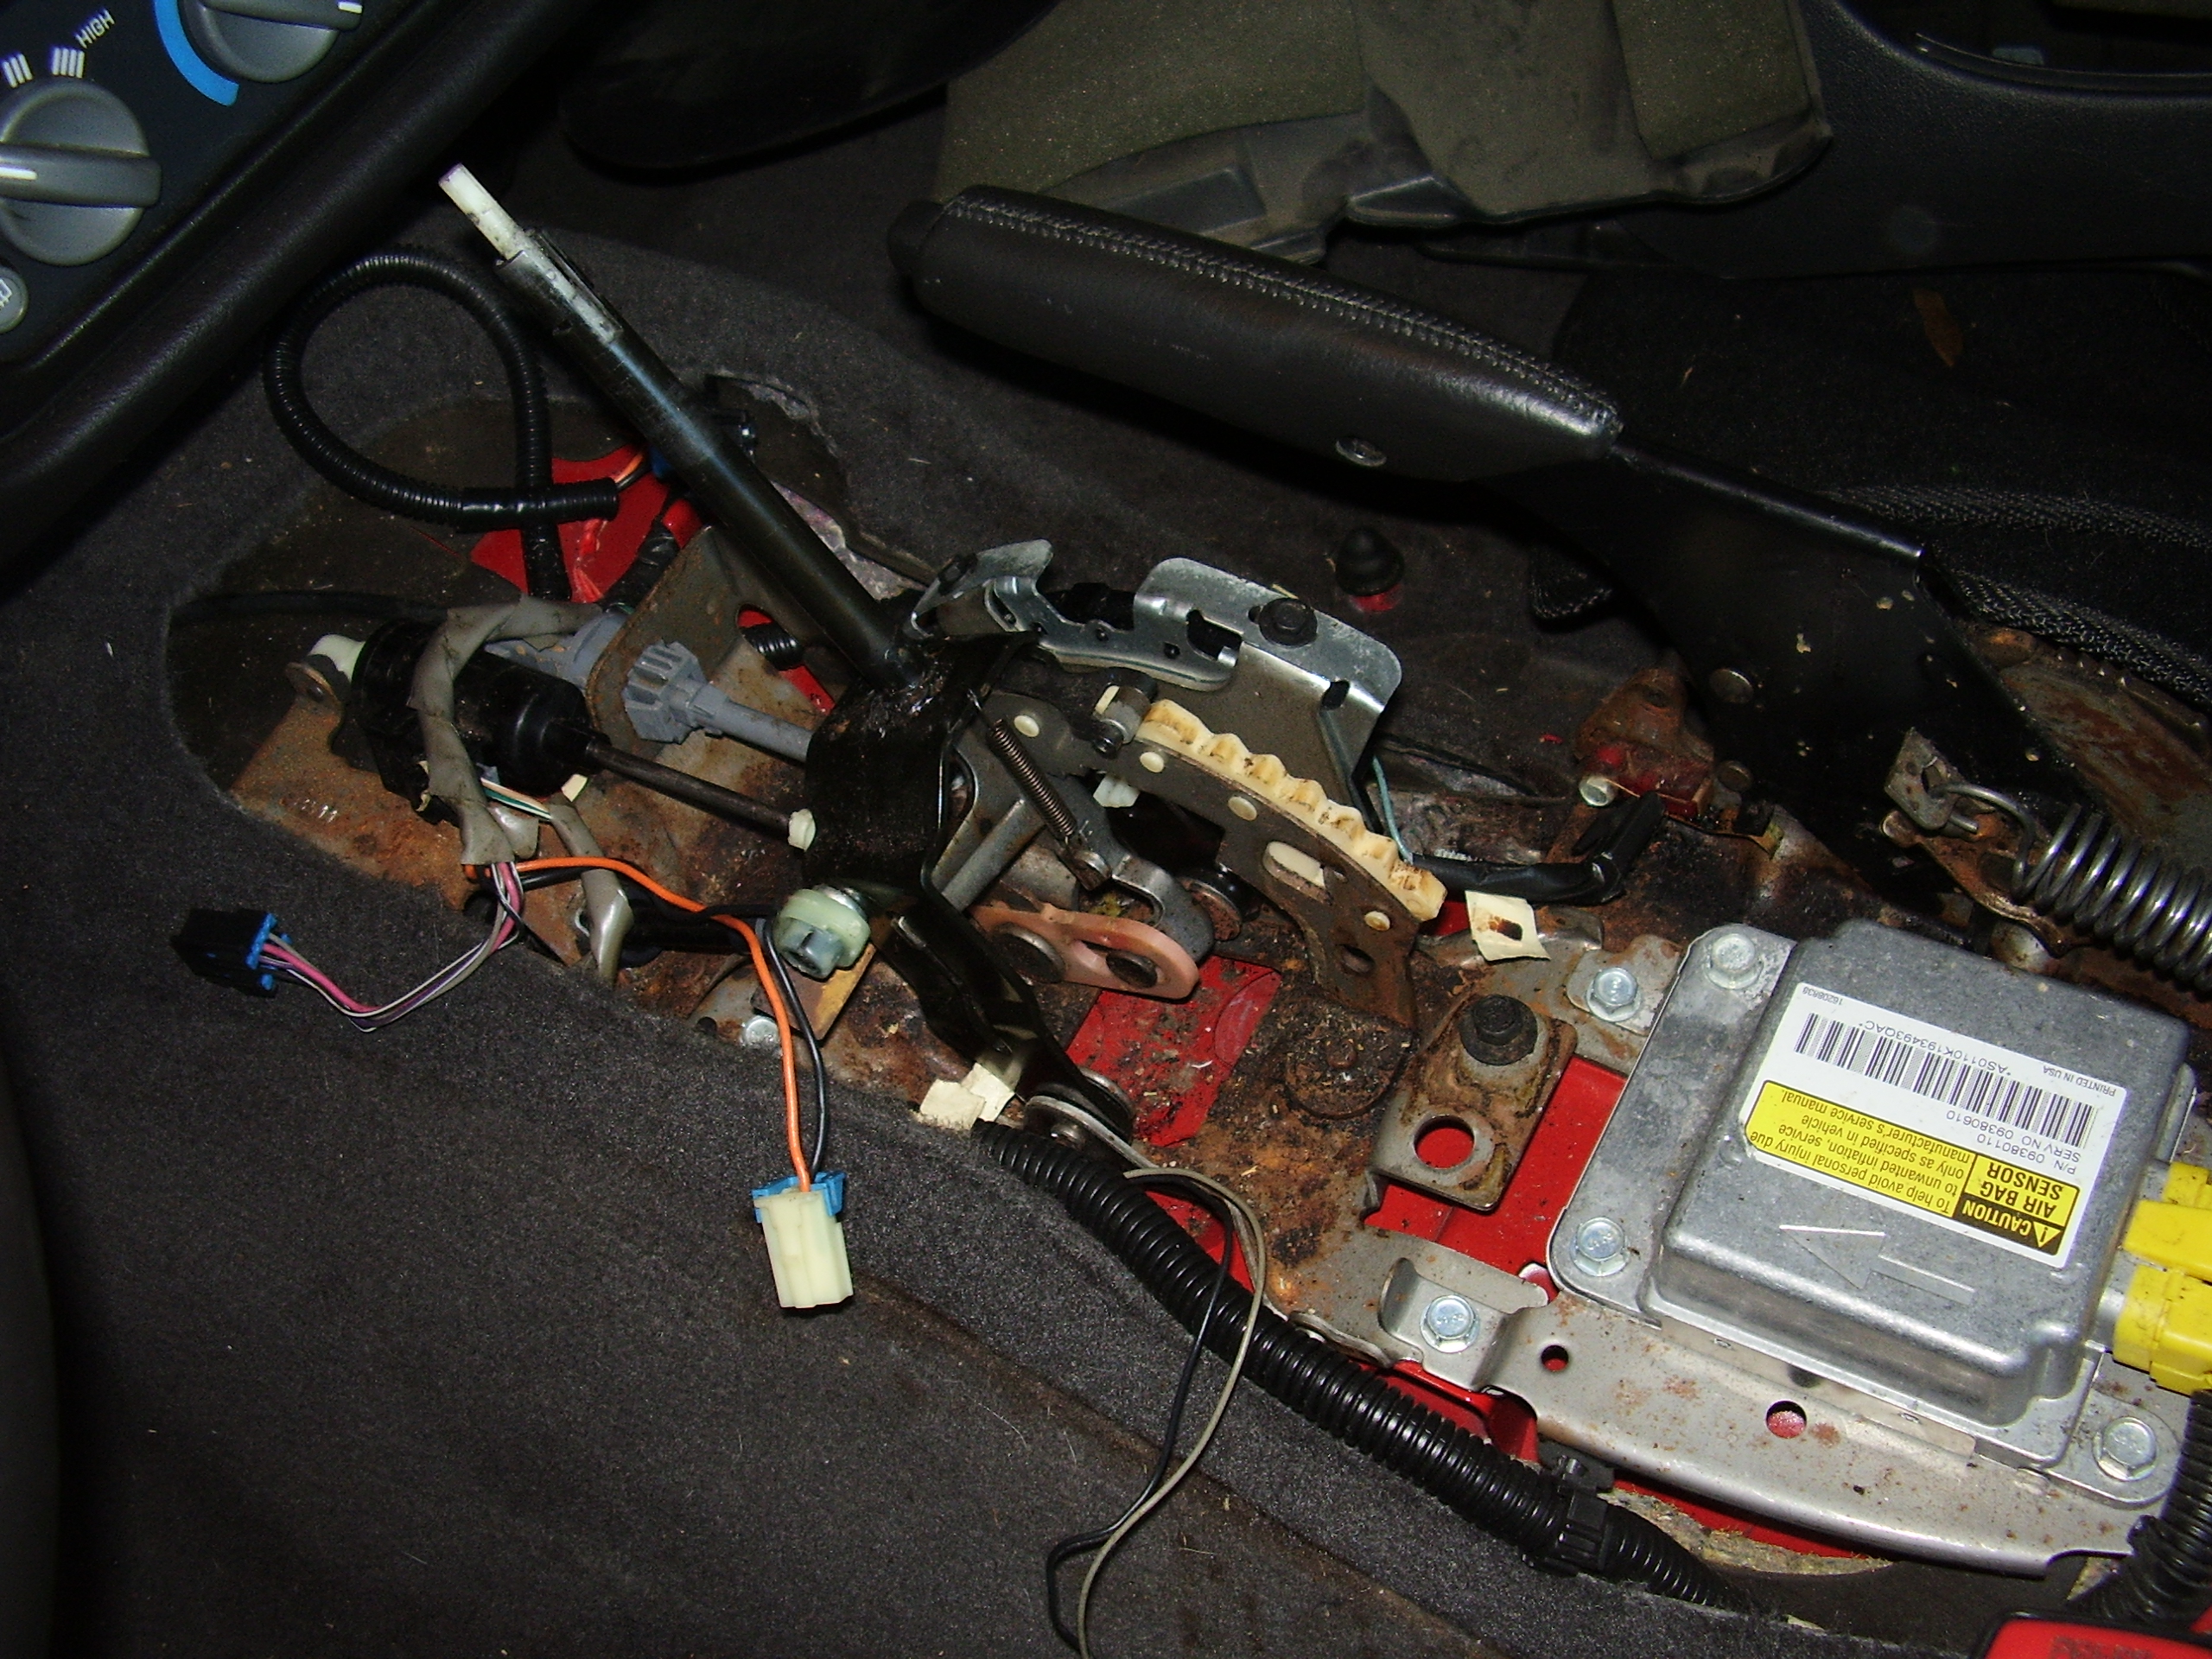
Removing it wasn’t all that bad once I figured out how the park lock cable and shifter linkage disconnected from the assembly.  With it out of the way you can see the formed pedestal that it was bolted to.  This has to some out as well except the air bag module also uses it as a perch.  There are 6 tack welds holding it in.

A4 Assembly Pedestal


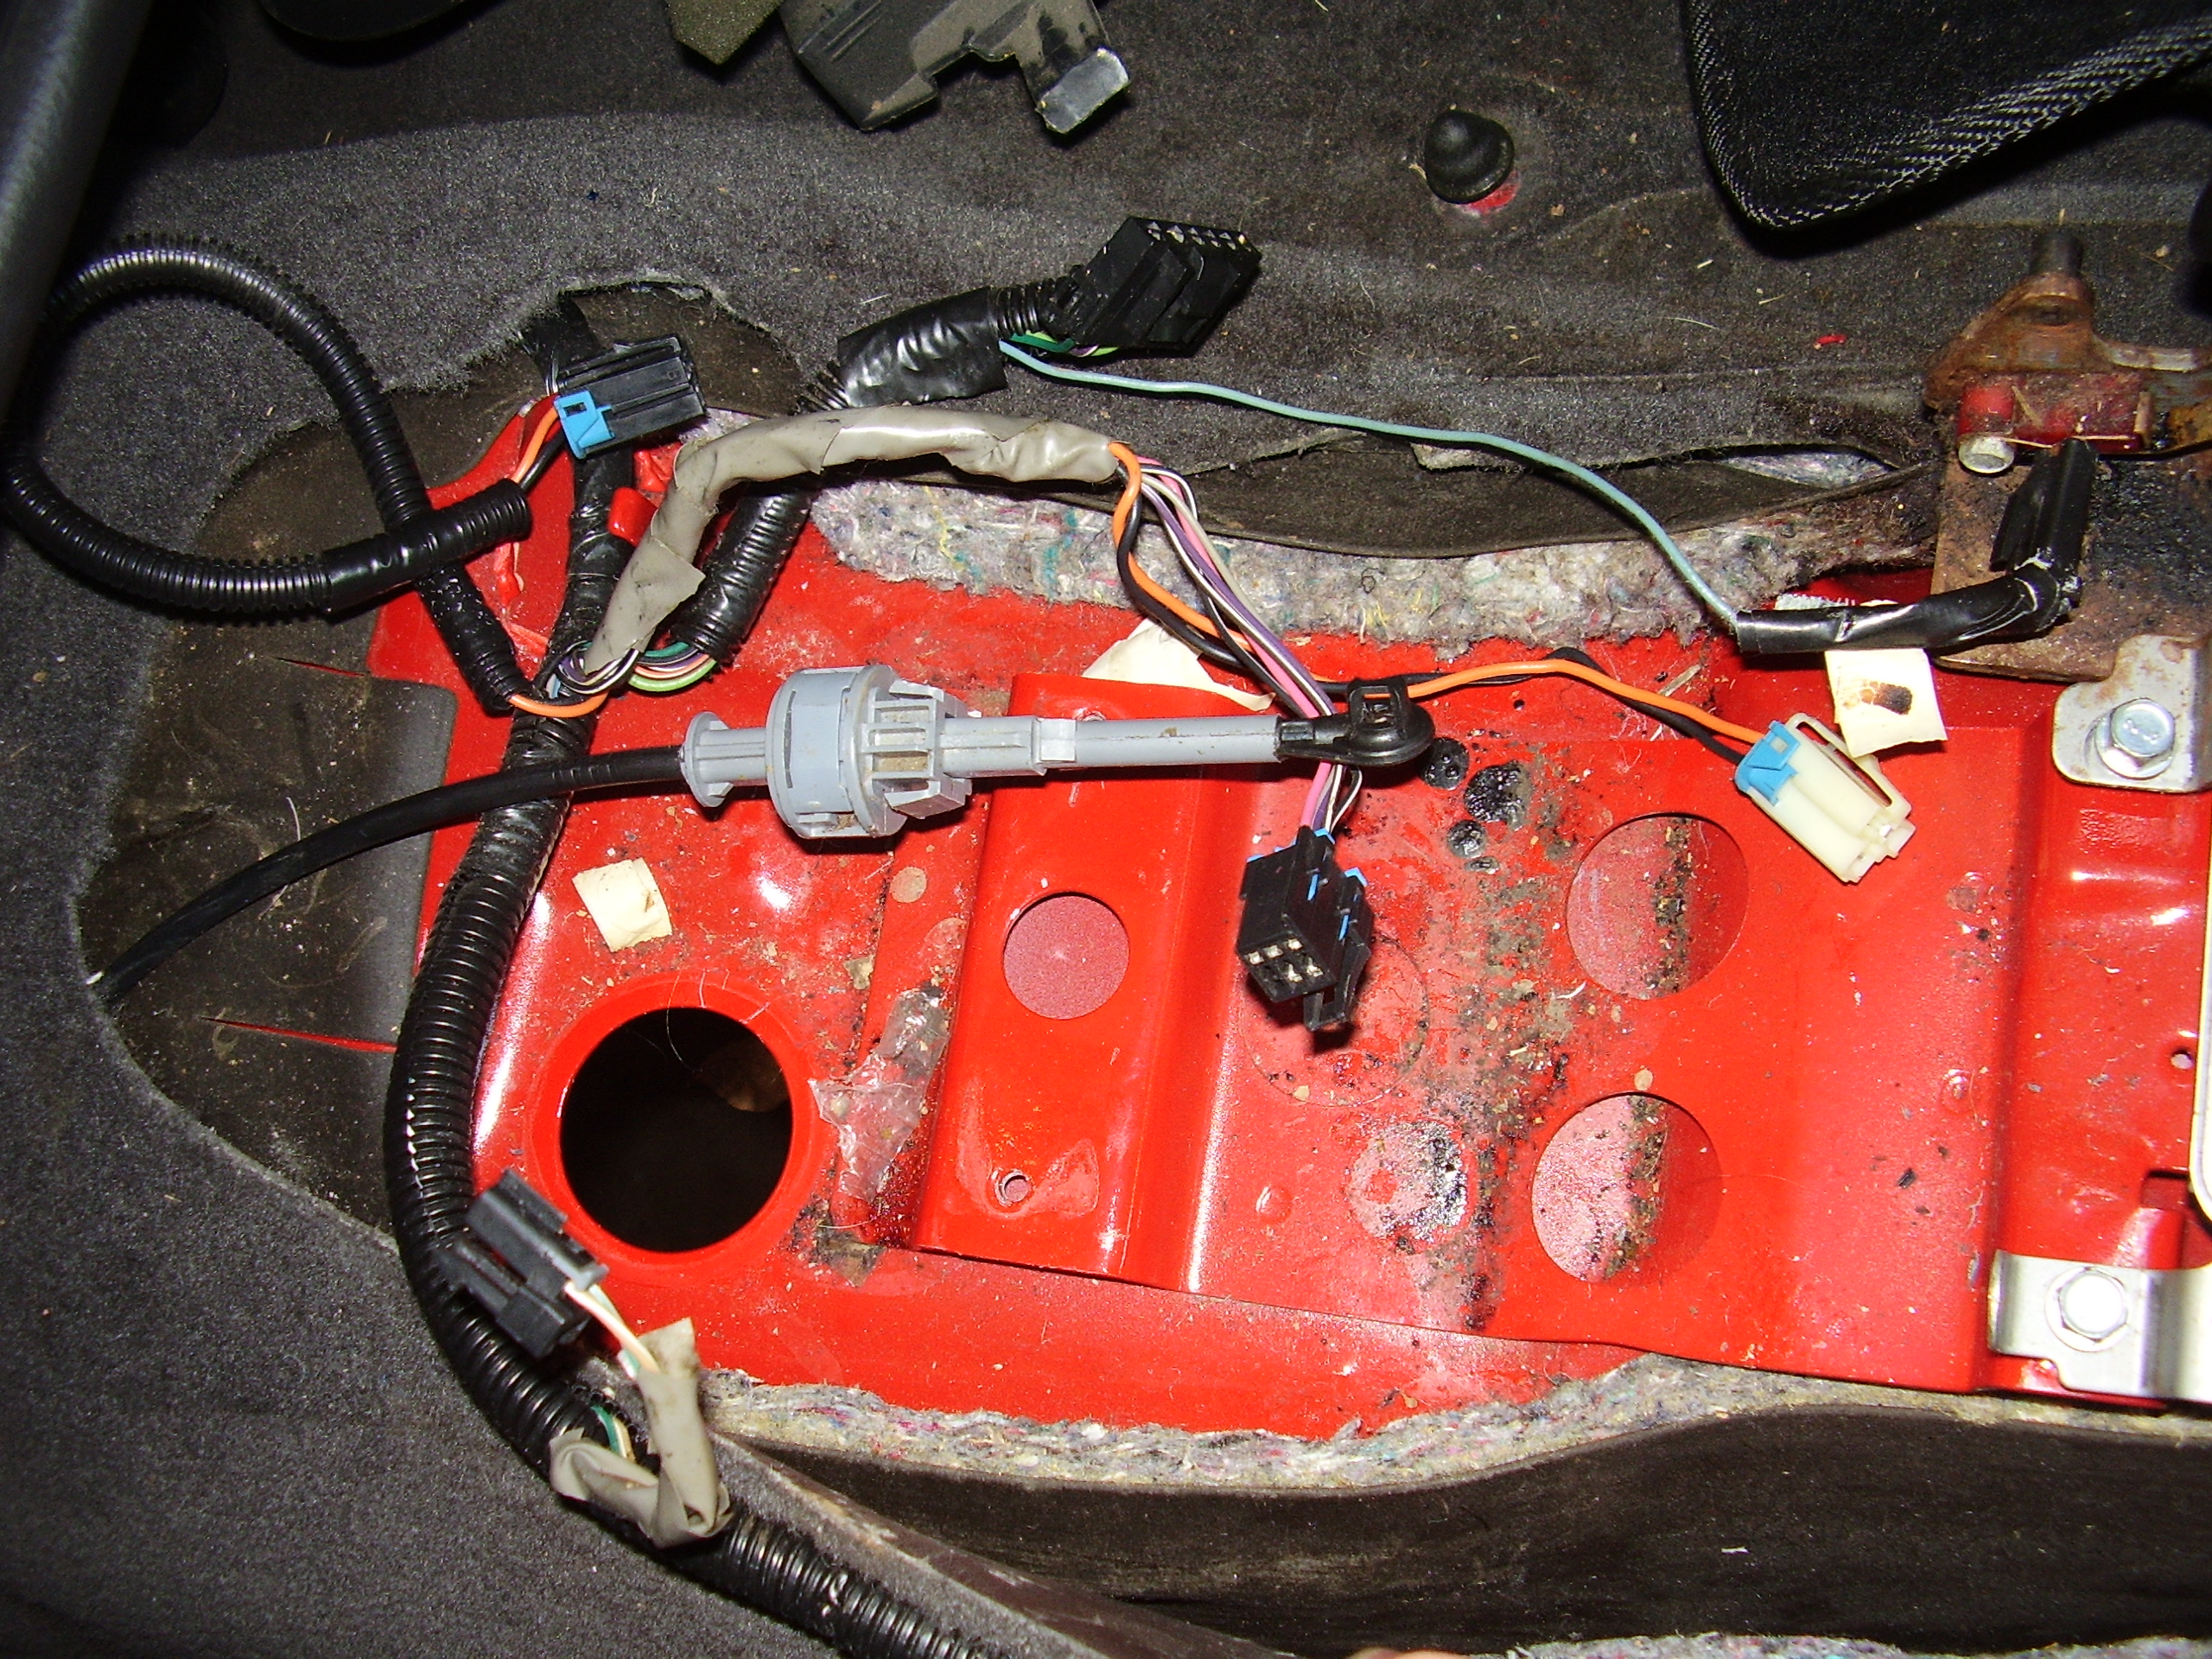
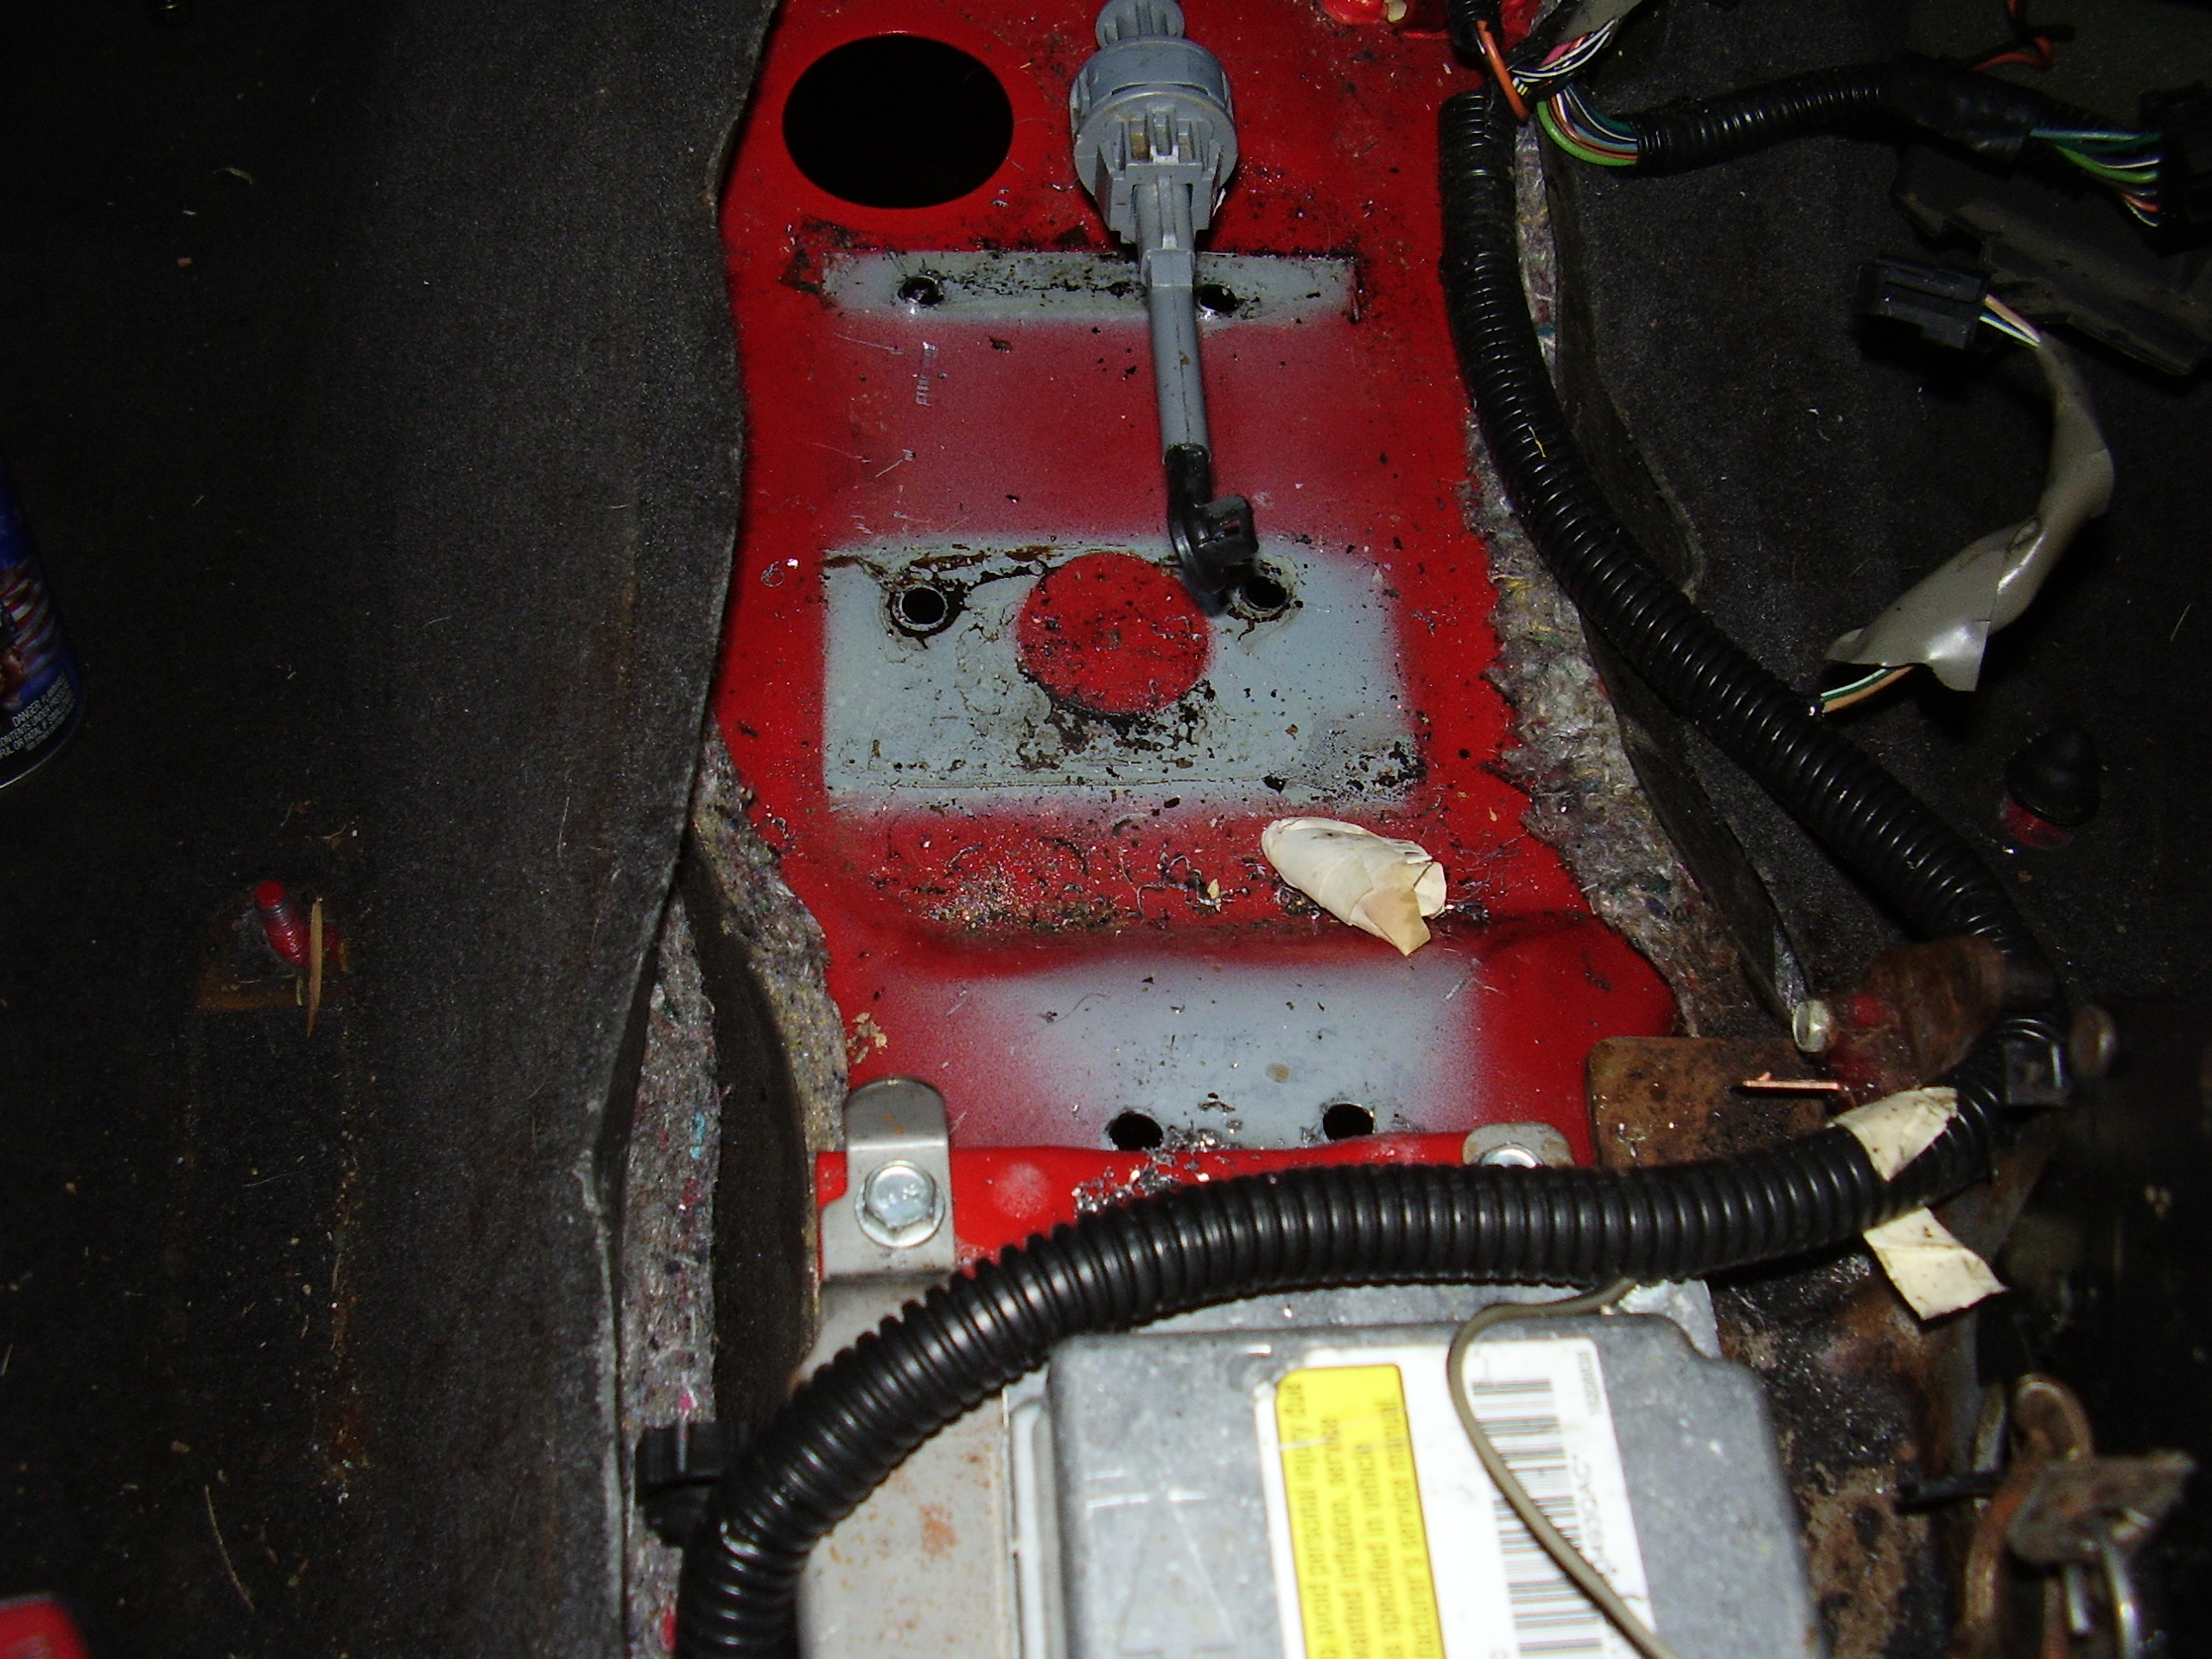
So I used a cutoff wheel and sawzall to separate most of it from the part where the air bag module bolted to.  I started off drilling into the welds.  And drilled, and drilled, and drilled.  The bit I was using wasn’t really doing anything other than continuing to get more and more dull with only putting a small dimple into the sheet metal.  I pulled it and went down to a much smaller size to start a pilot and then step drill the holes up in size until the welds were gone.  Yea, that didn’t work out either since the smaller bit broke after about 3 revolutions.  I guess the HFT HSS bits just weren’t up to the task.  I broke out the Kobalt titanium bits, sprayed a little WD-40 and started punching holes in the steel.  However my titanium bits on went up to 1/4″ and that wasn’t large enough to completely separate the welds and it was still stuck good since a prybar wouldn’t budge it.  Took a trip down to Home Depot and picked up a set of cobalt bits up to 1/2″.  They chewed through that steel like it wasn’t even there.  I know what kind of bits I’m going to be using from this point on.  Unfortunately I wasn’t able to get rid of the large grey bit in the middle there connected to a cable.  That is the park lock cable and it connects to the steering column which I have no desire to pull out unless I absolutely have to.  It will likely get tucked up somewhere in the dash.  And here we are with the assembly mount out of the way.

A4 Assembly Pedestal Removed


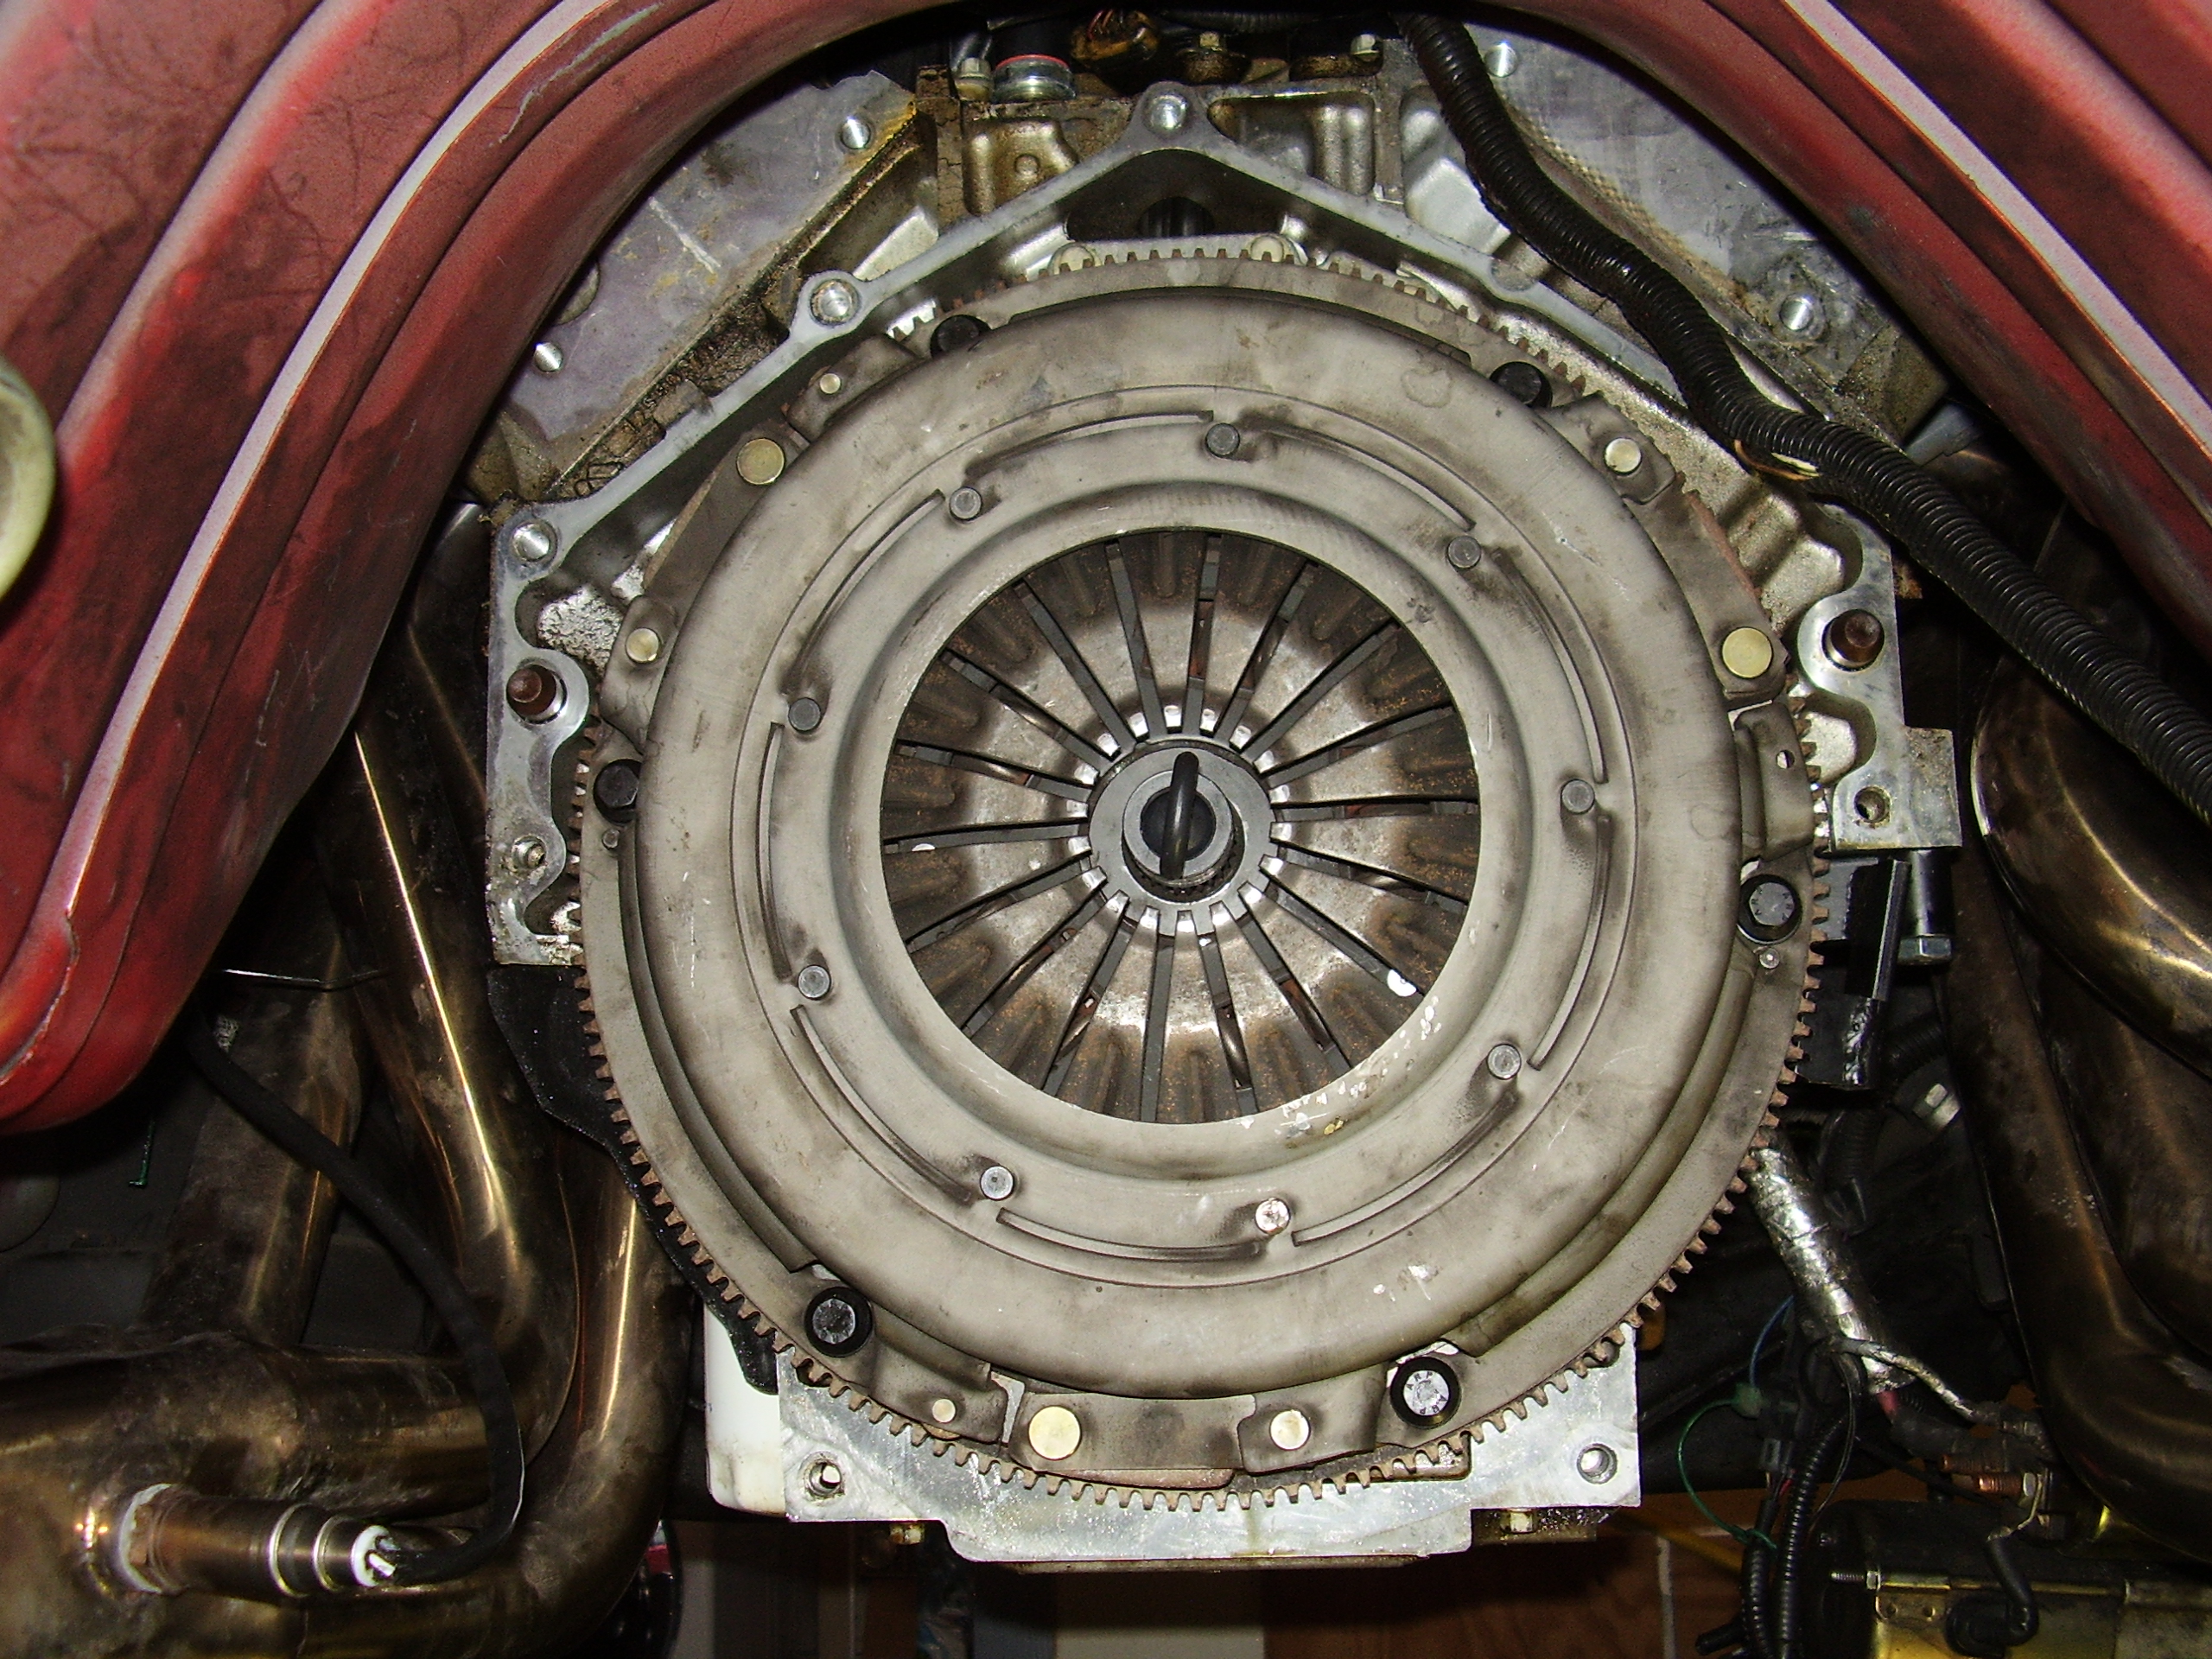
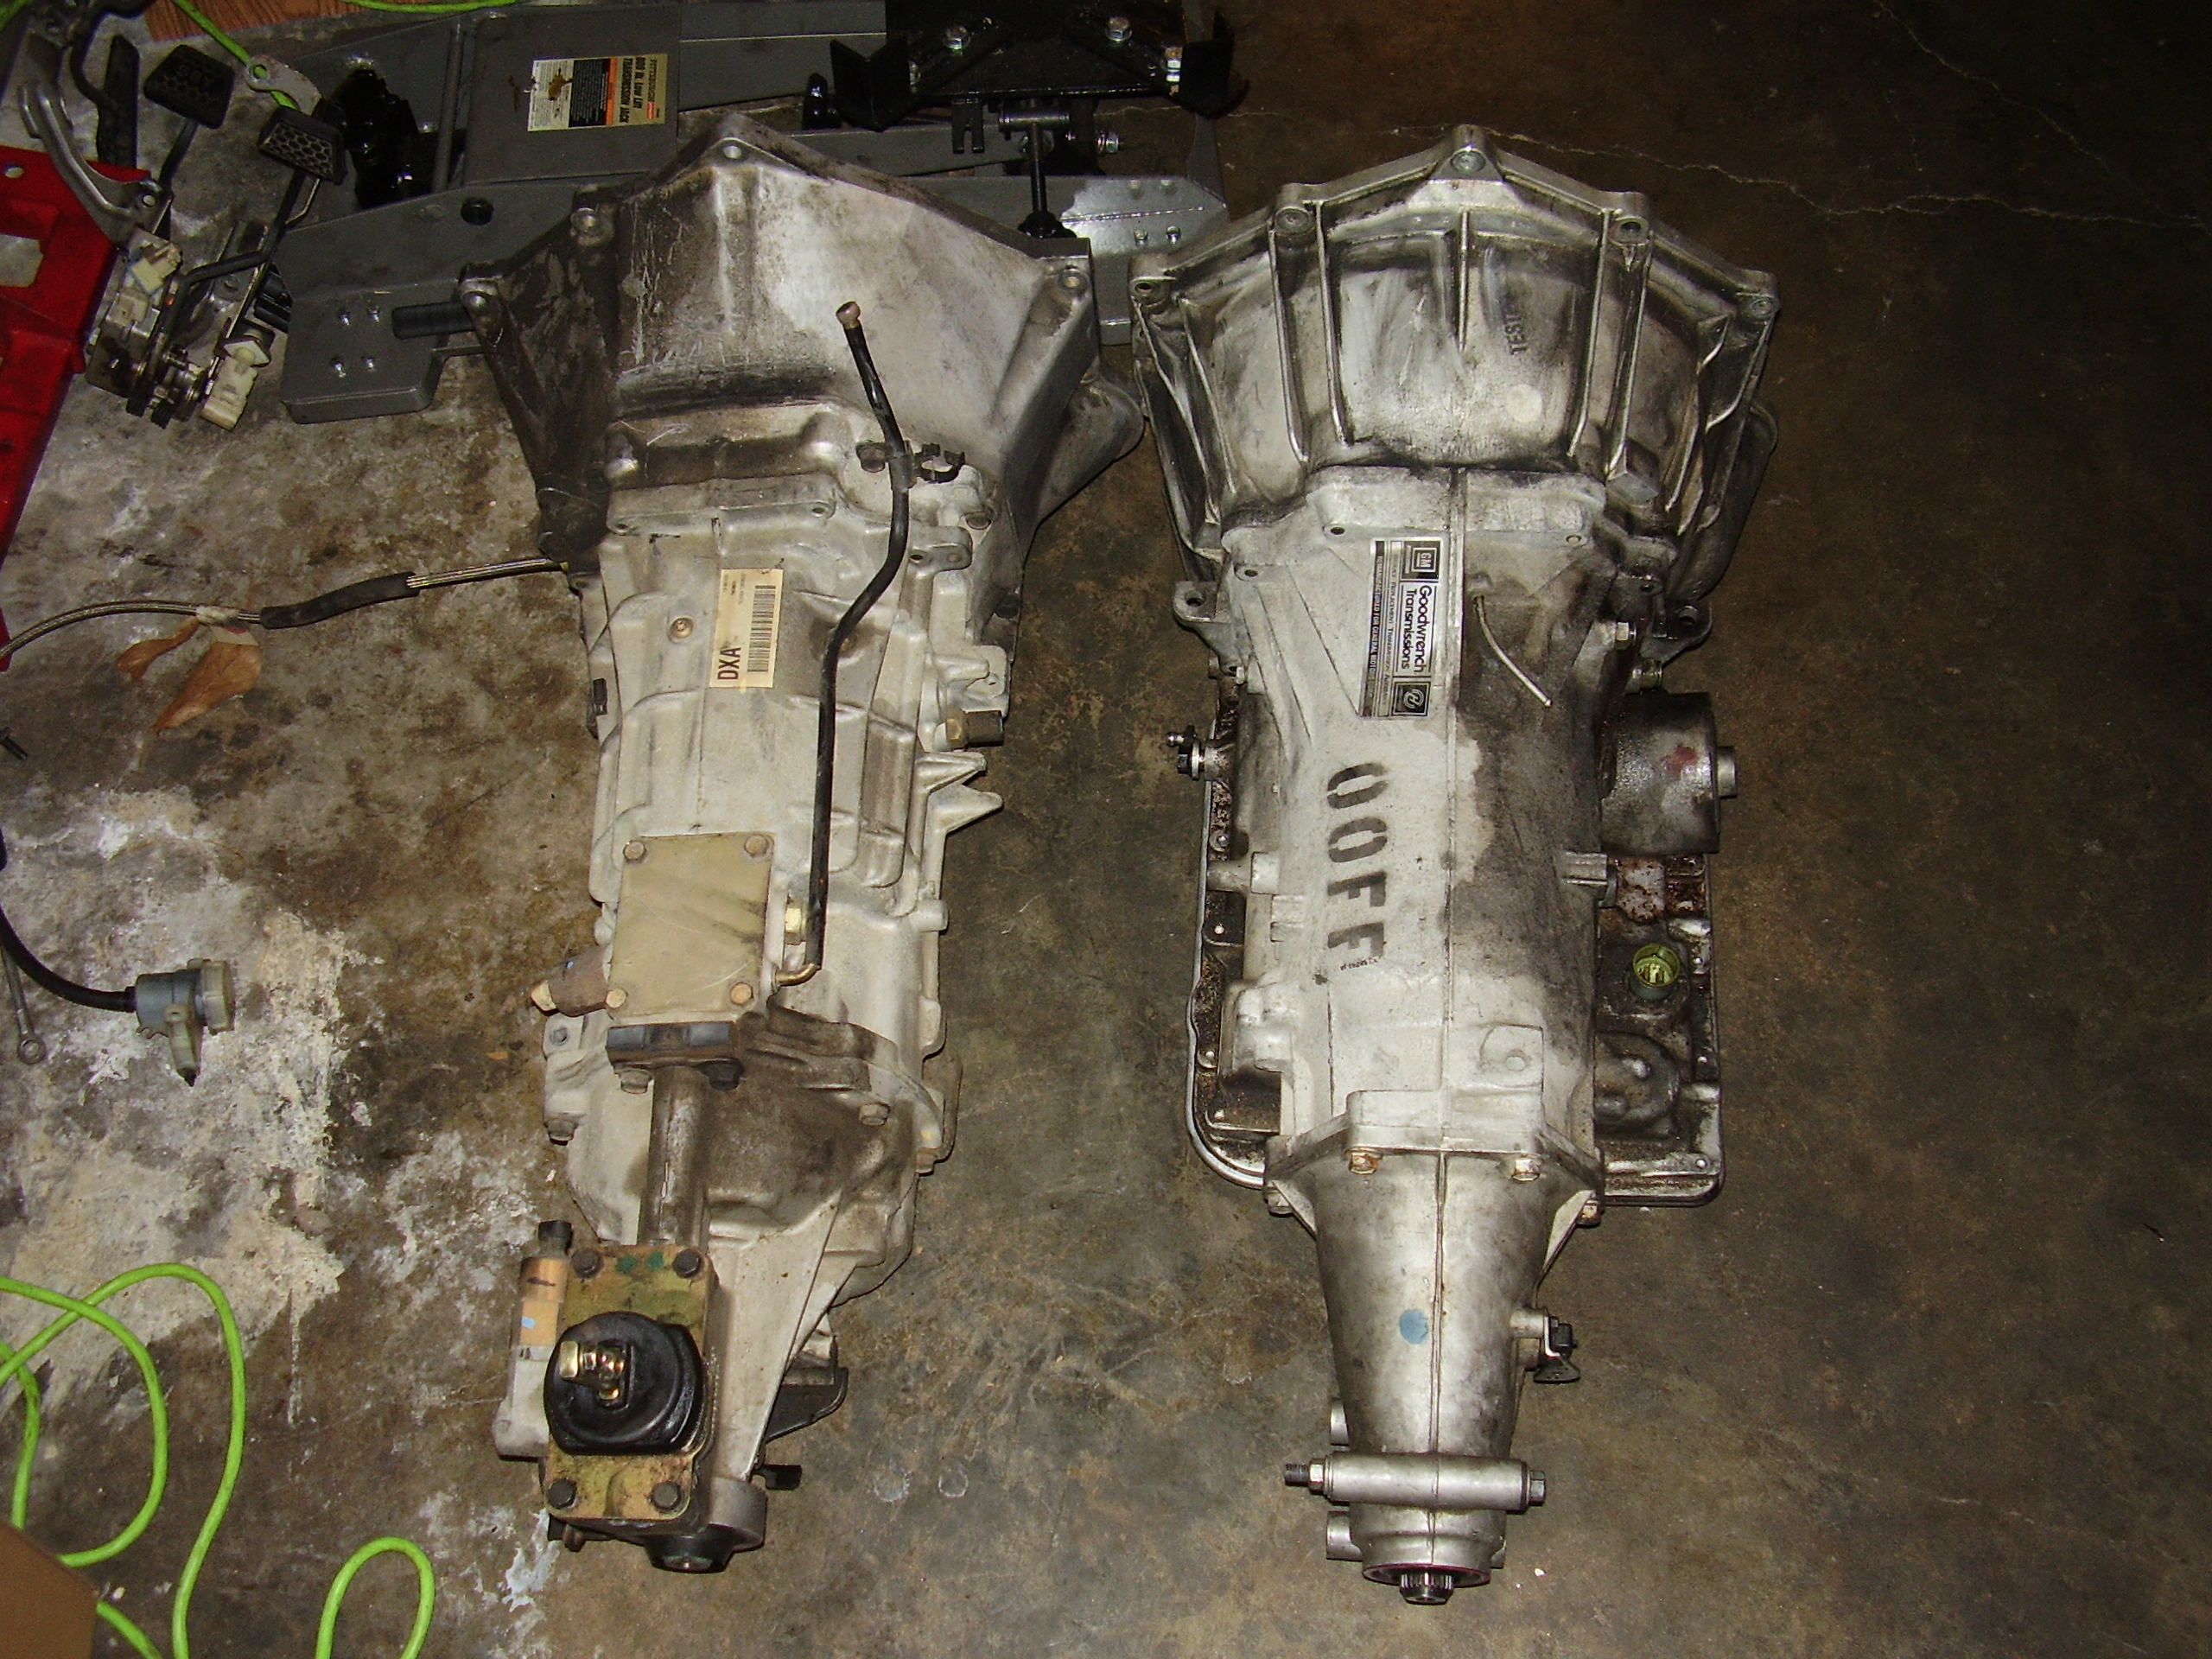
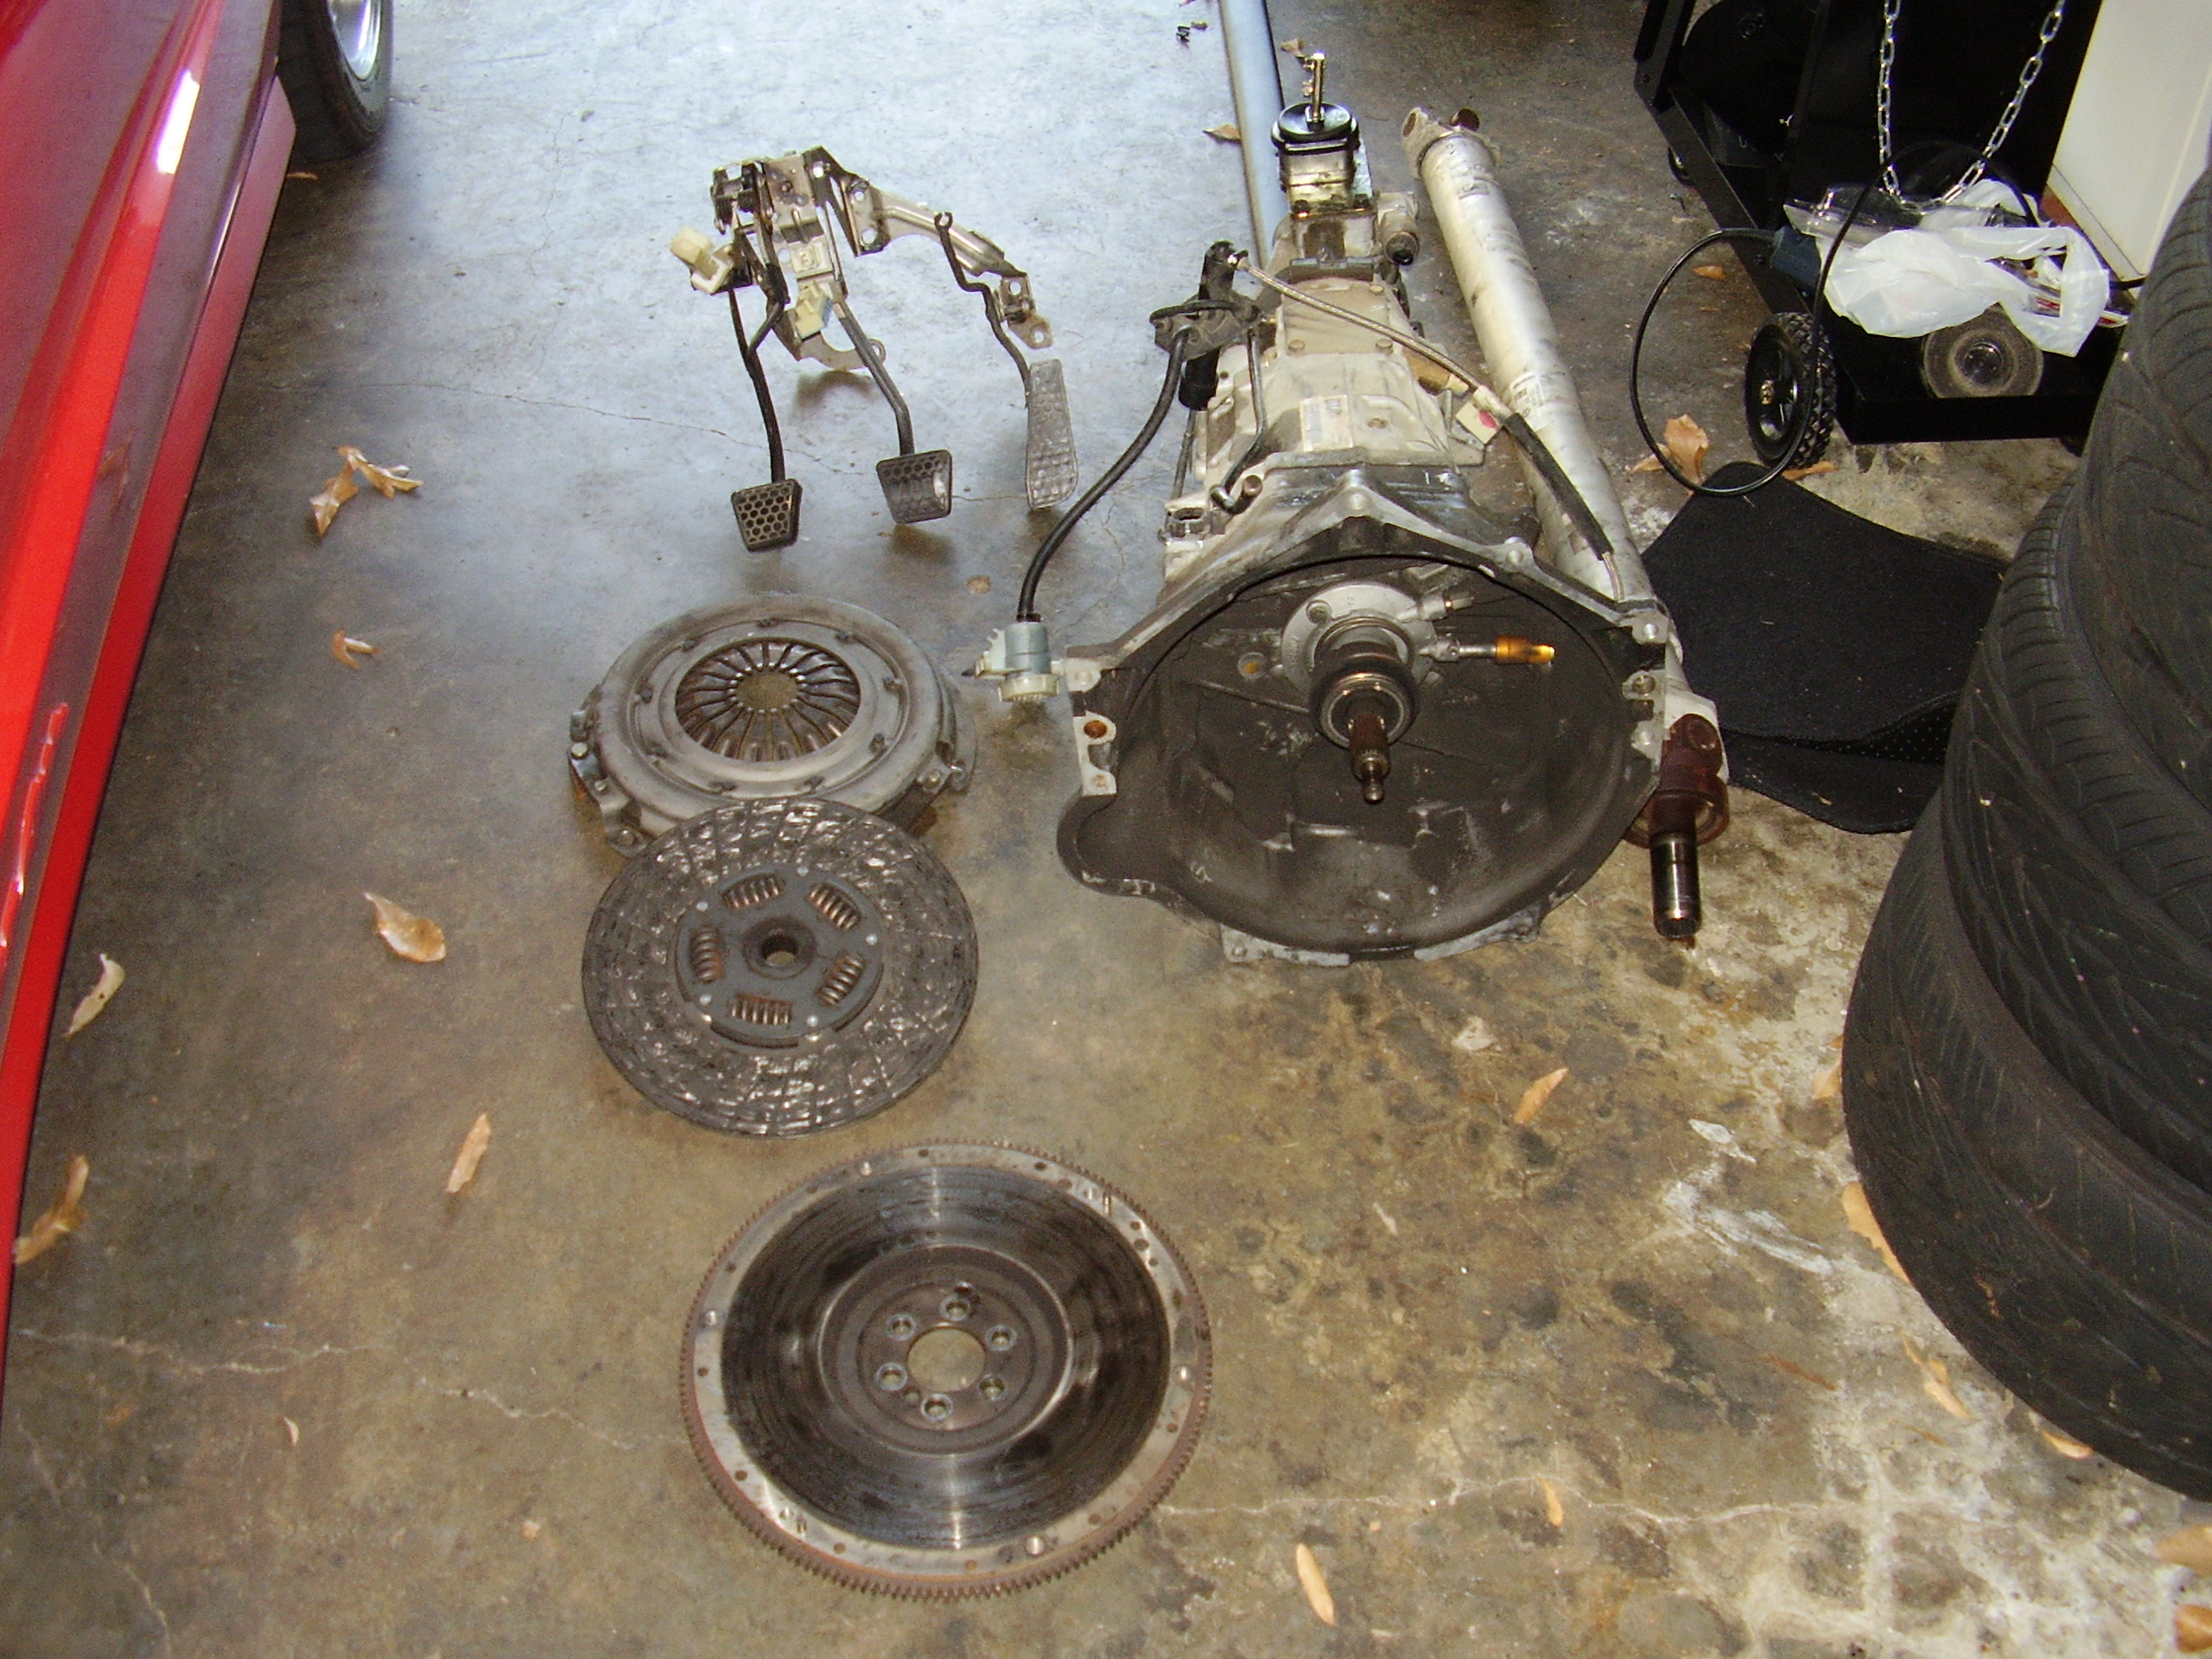
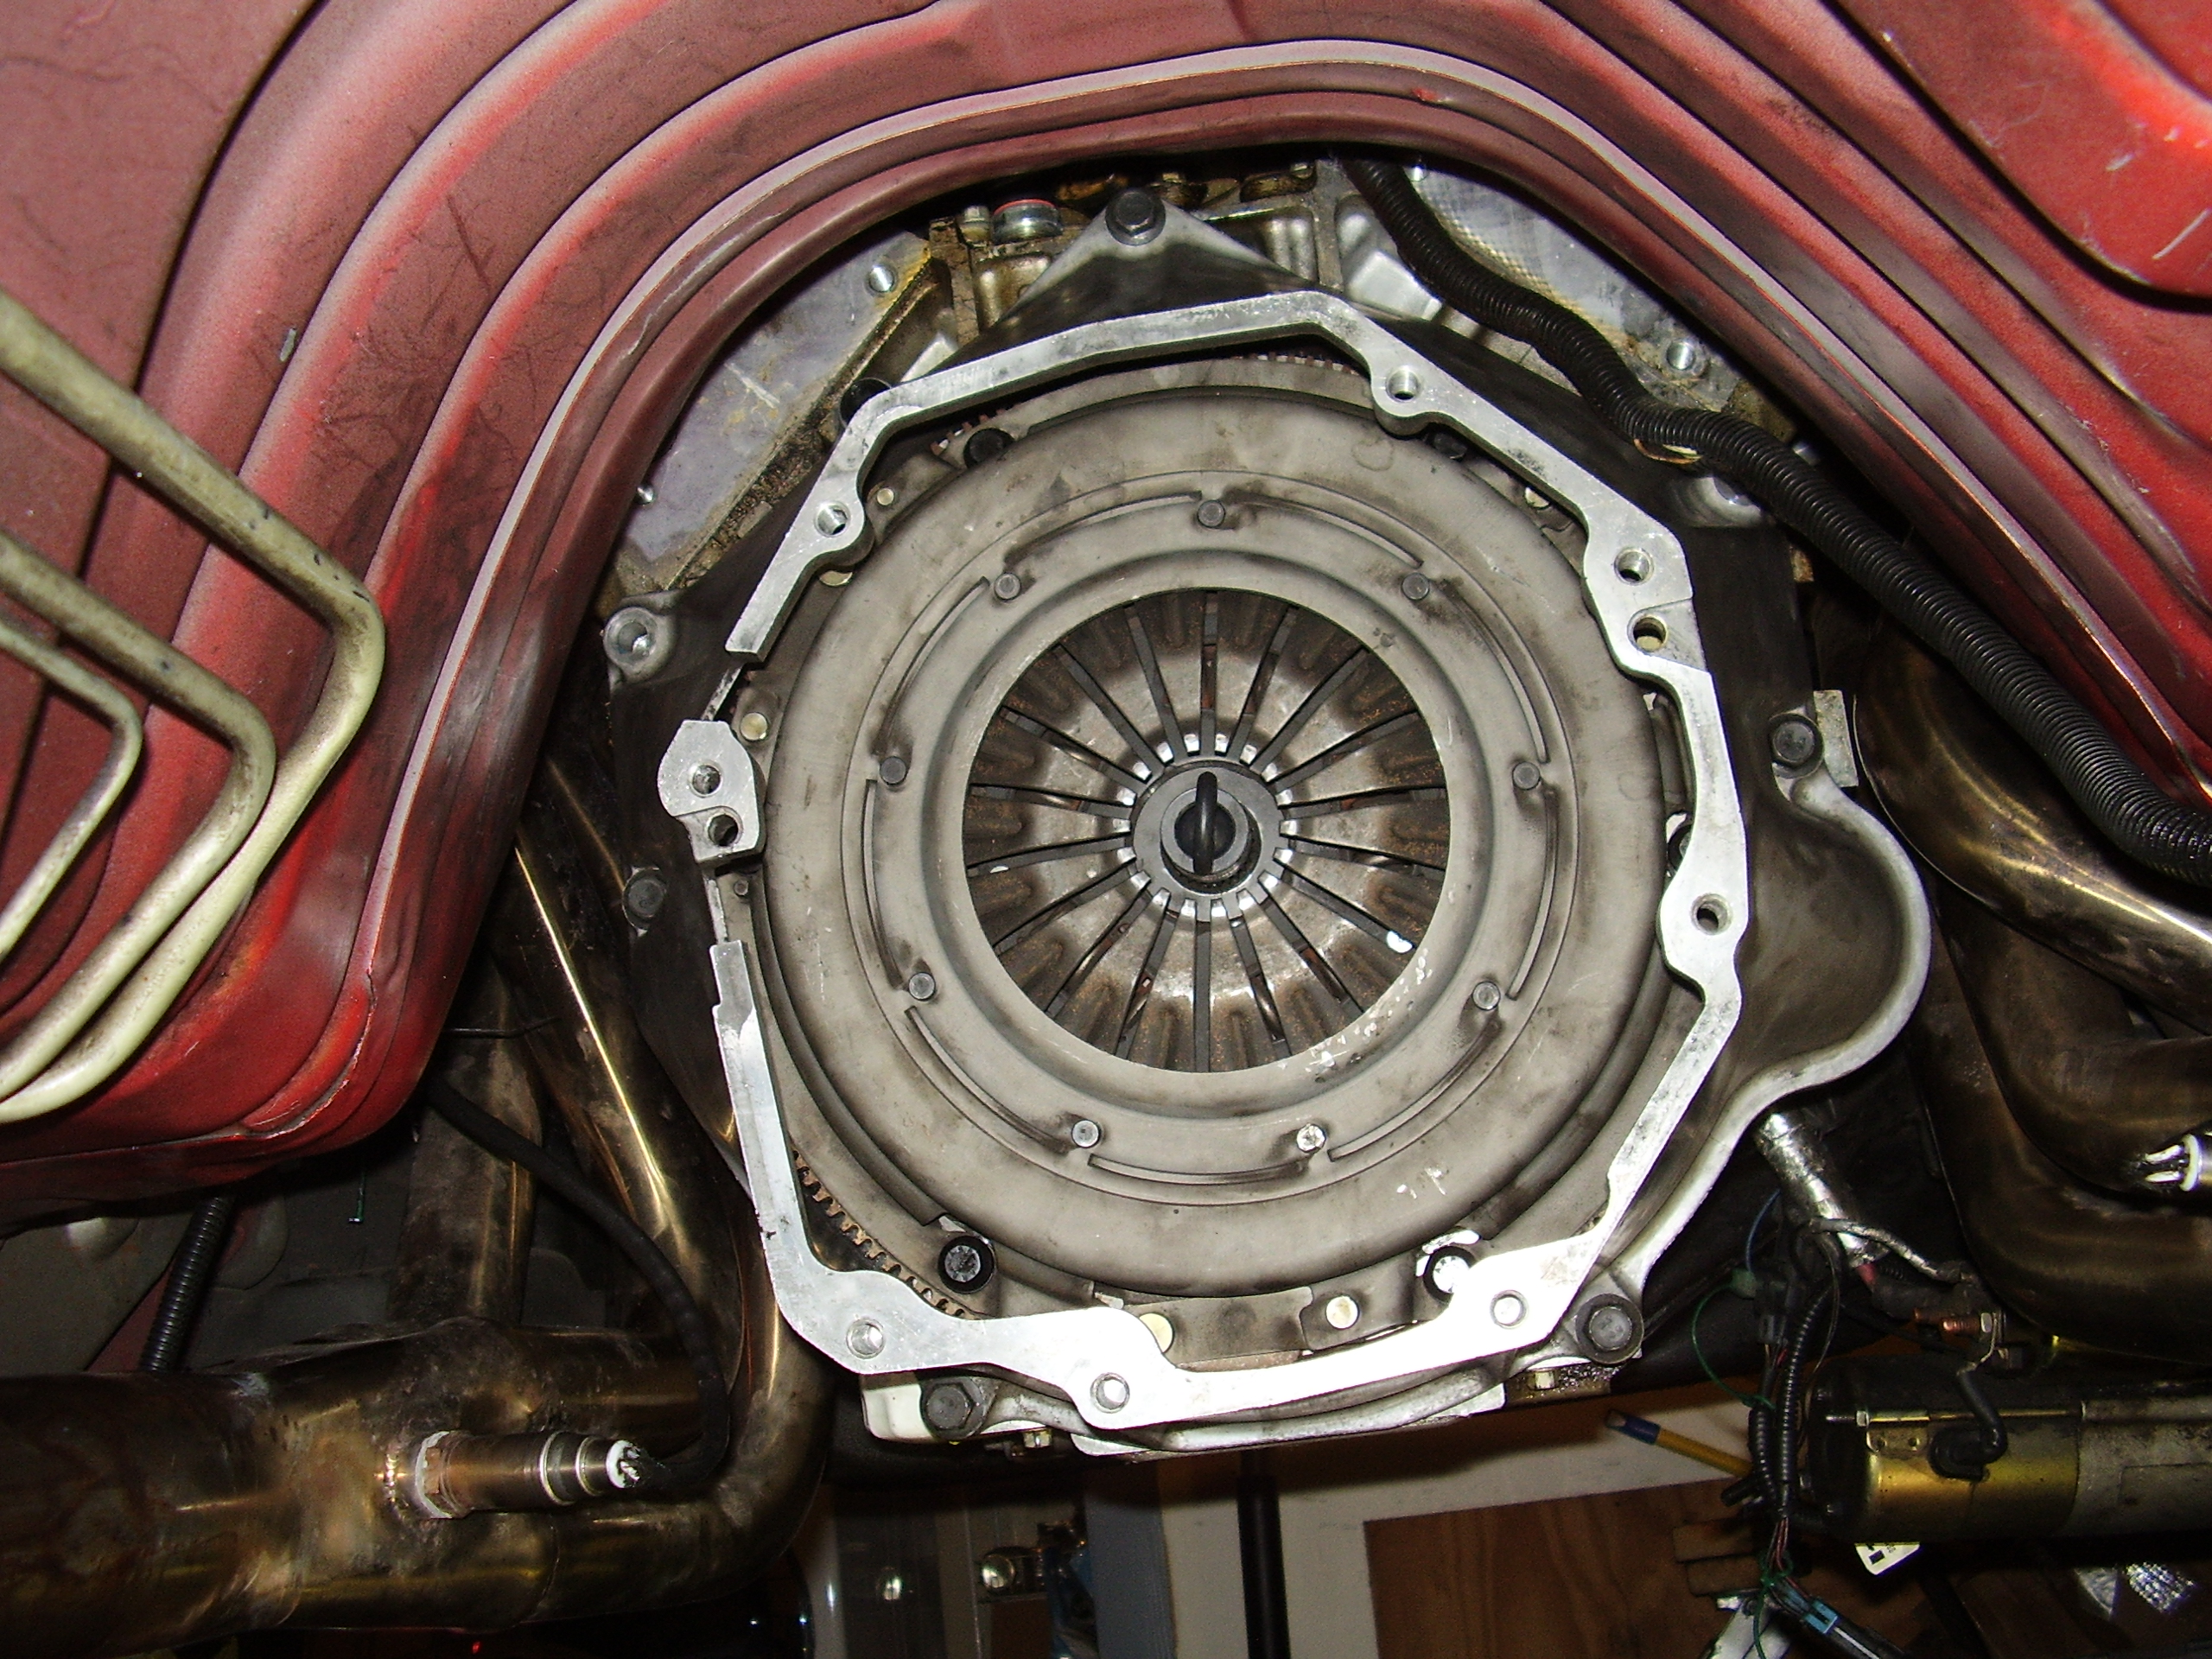
Next up is the T56 bellhousing.  Got it fitted to the block and all bolted up.  It is so much easier to bolt on than the 4L60E auto was since I can actually see the bolt holes and don’t need 4-5 feet of ratchet extension to reach.

T56 Bellhousing


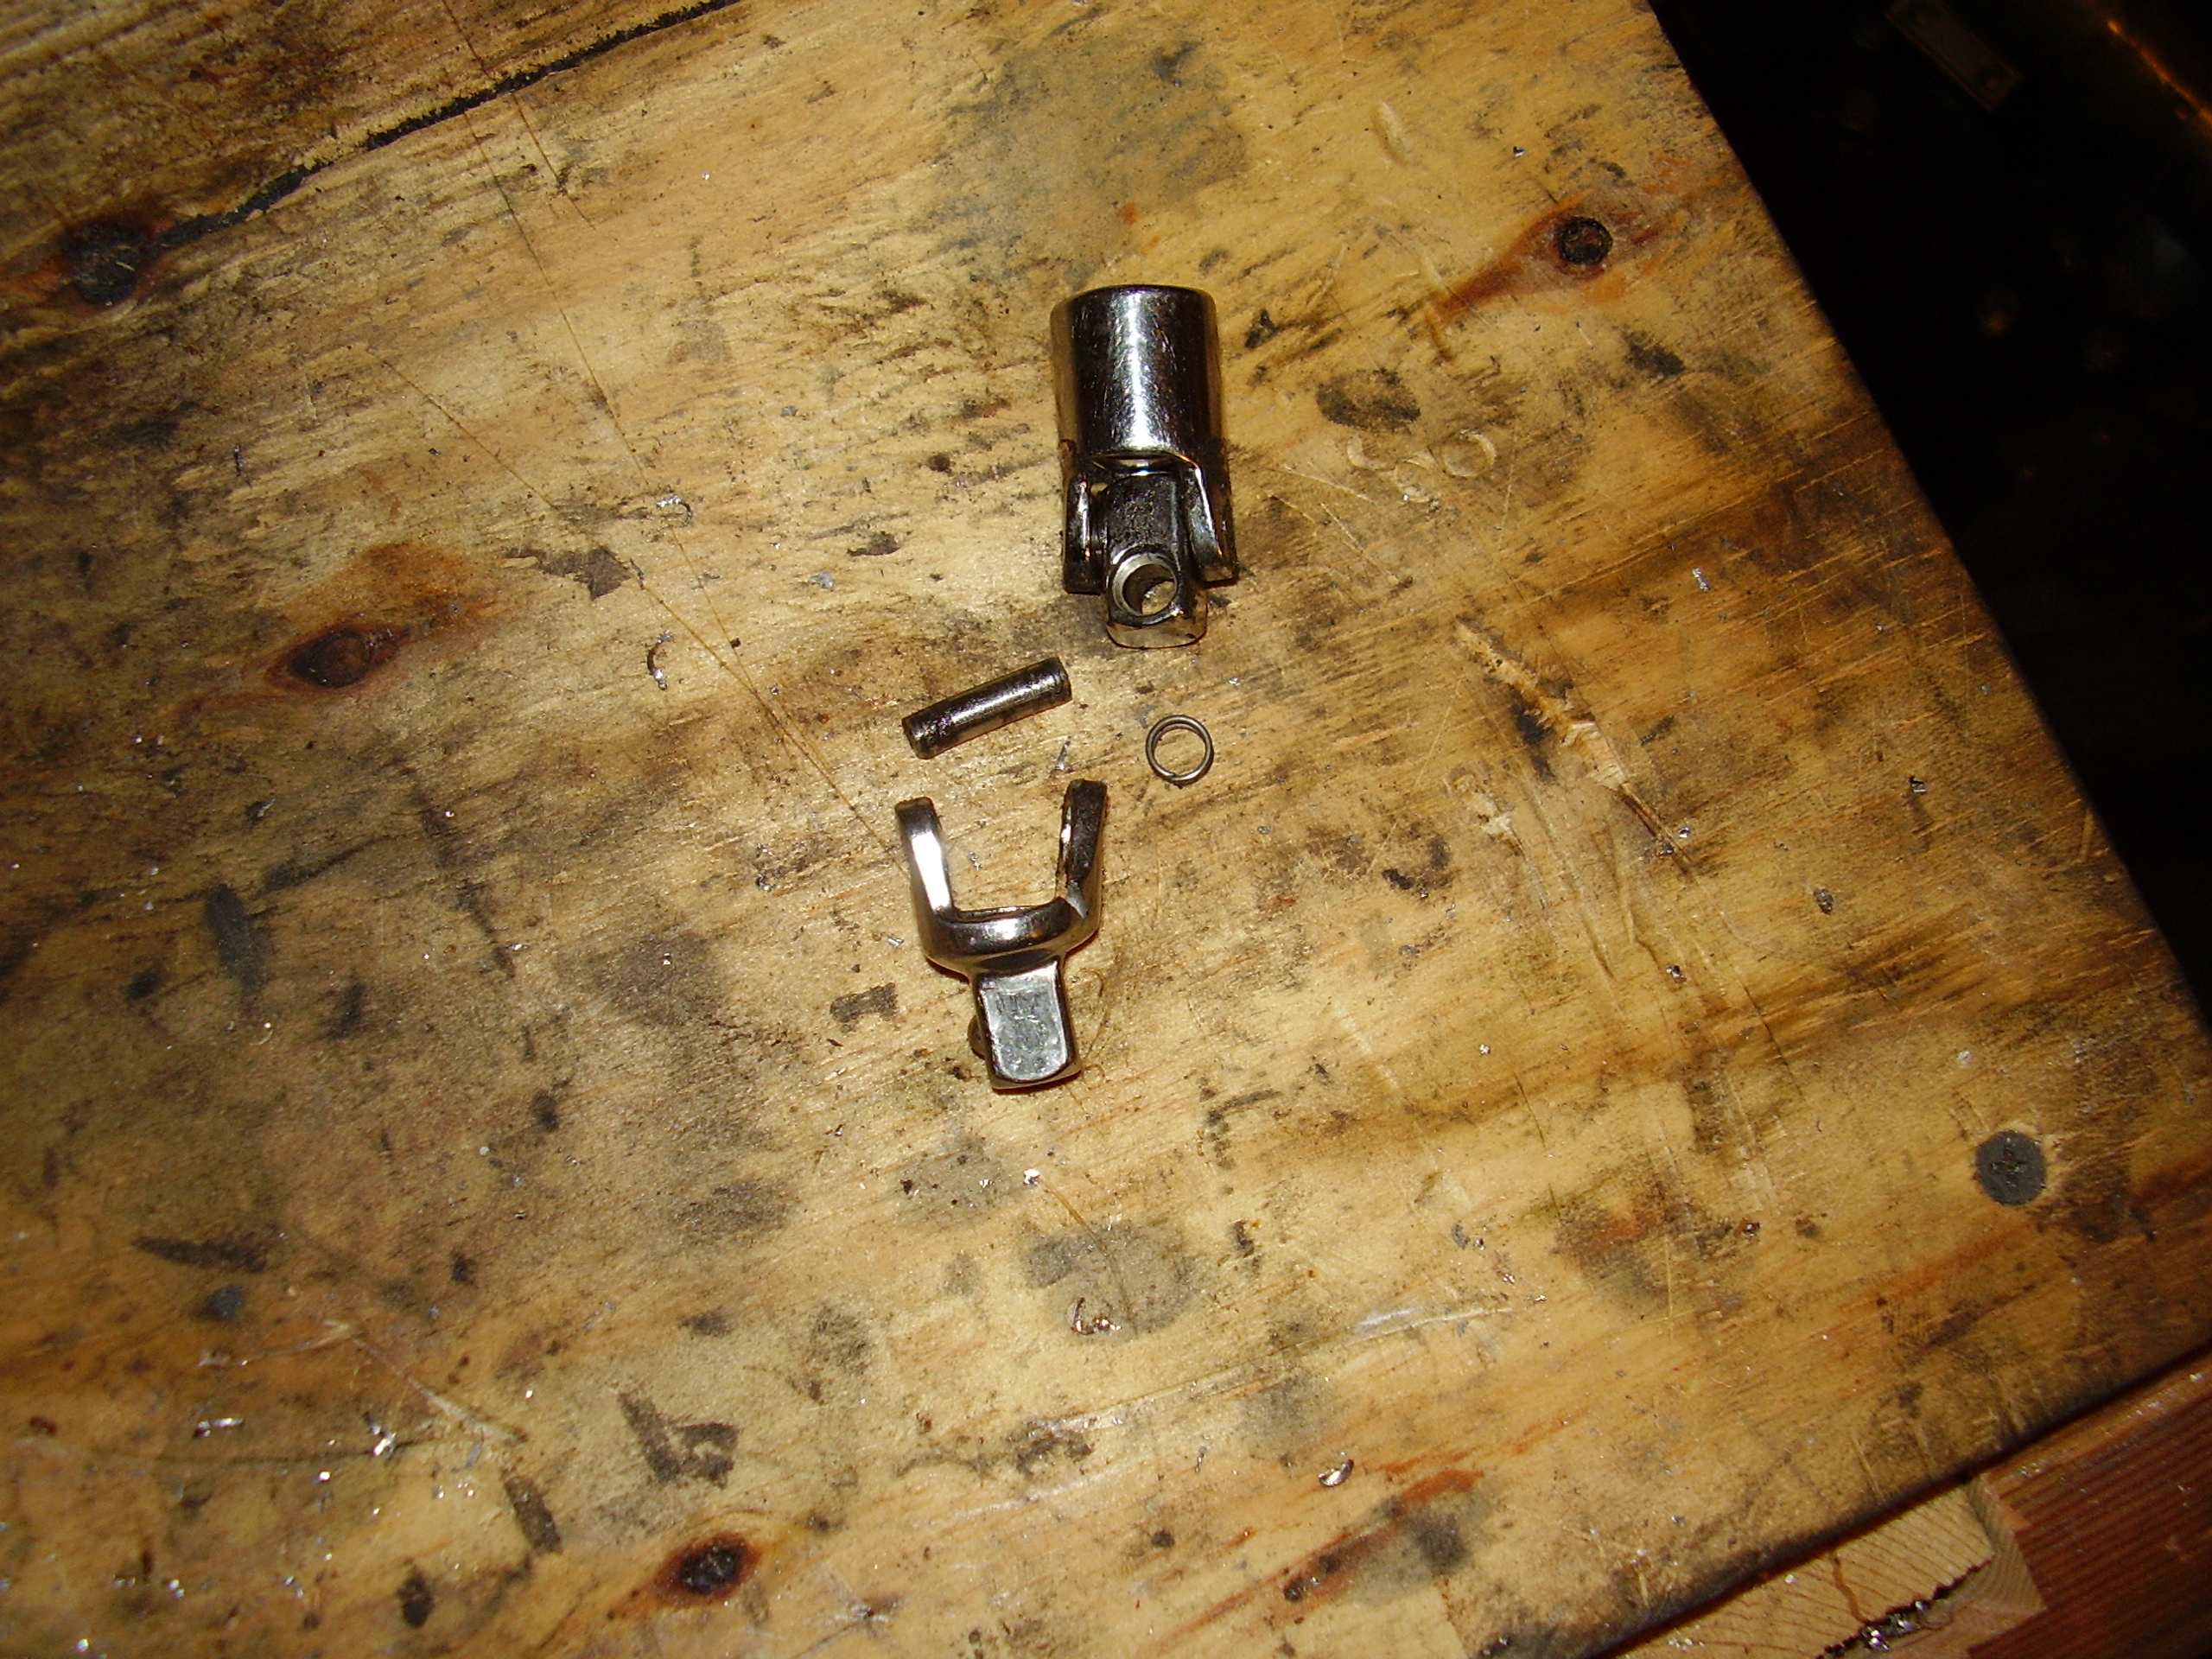
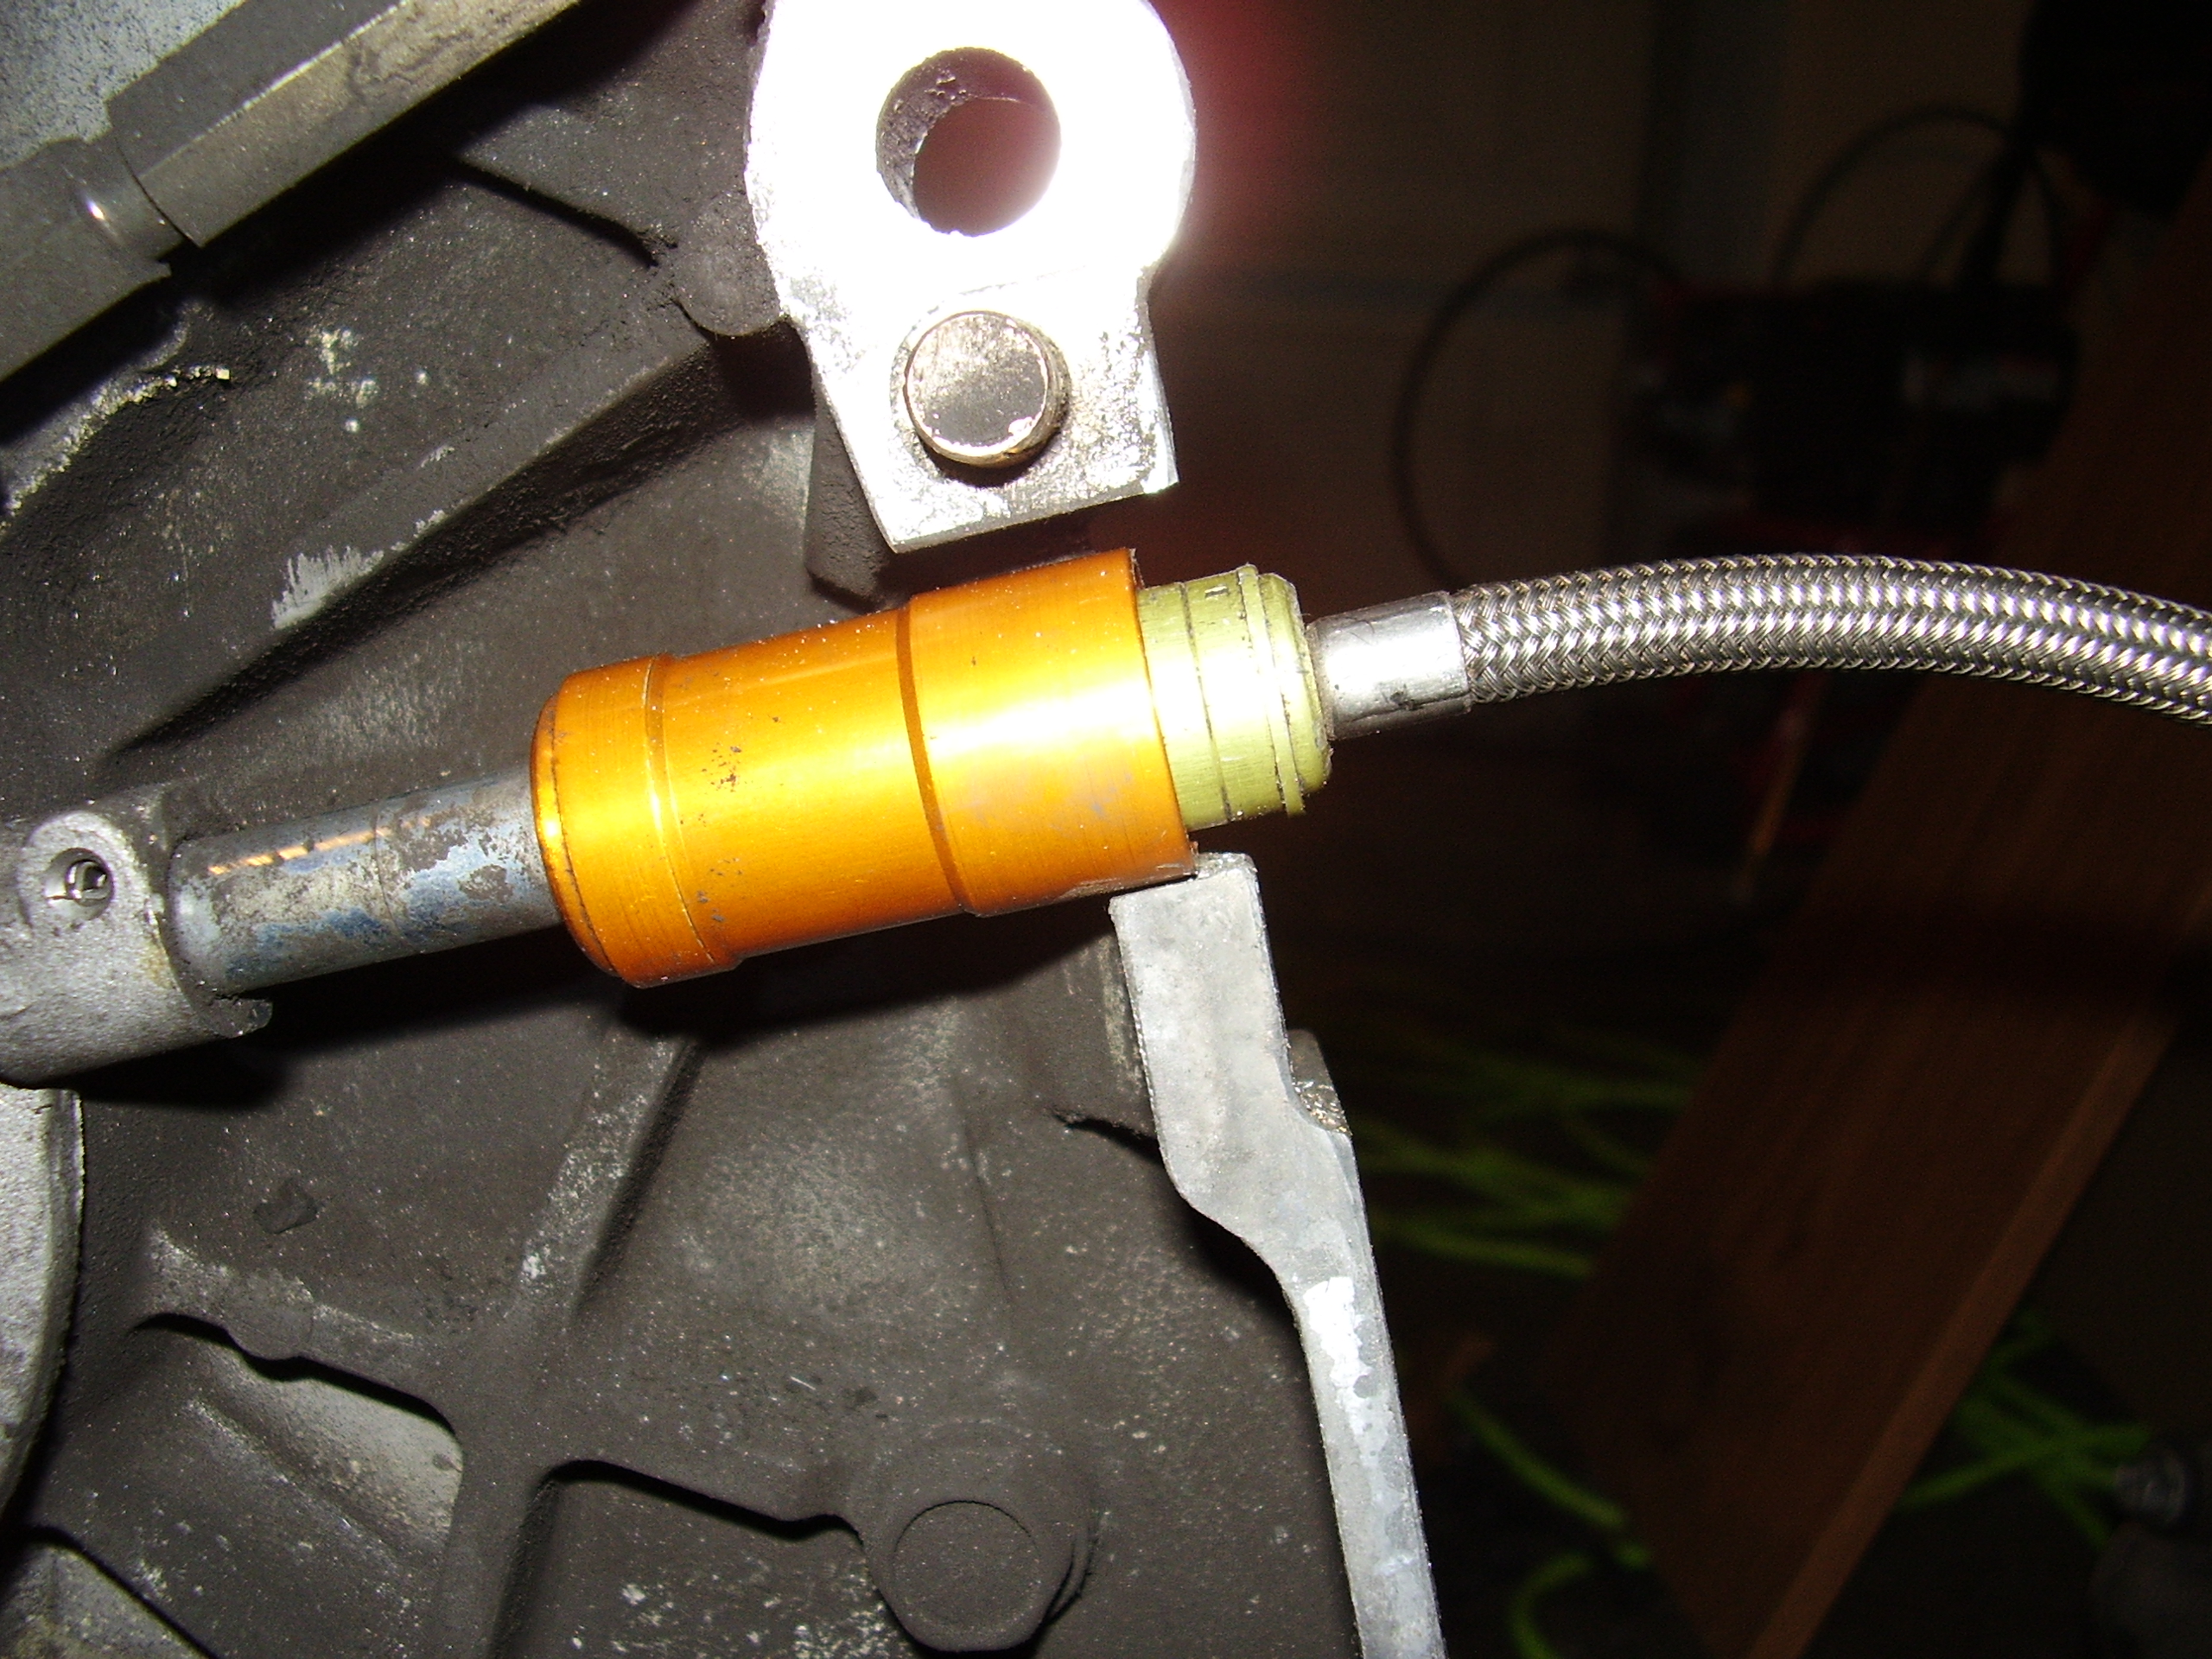
I was then going to test fit the T56 and trace out the area on the tunnel that I will need to cut out for the shifter to fit through but this is where I ran into the problems for the day.  When the transmission was brought to me, the master cylinder was still connected to the slave but didn’t think much about it since I thought maybe it was done to keep it from getting misplaced.  Oh nooooo, it was because whomever was the last person to mess with the clutch or it’s hydraulics left out a key piece of the quick disconnect fitting.  The plastic sleeve that slides into then female portion of the quick disconnect and presses the fingers down allowing the line to come apart.  I tried every A/C & fuel line quick disconnect tools I had and none would fit properly enough to get down into the fitting.  So I put the T56 on the tranny jack, chained it down and lifted it into the air a little to get a better look.  The next problem came when I went to tilt the tranny back some to get better light on the slave cylinder.  As soon as the tailshaft was at a slight downward angle about 3 quarts of tranny fuid dumped out onto the garage floor.  I don’t know about you folks, but anytime I plan to remove a trans I generally drain it first to lighten it up some and avoid extremely messy situation such as this.  So after a roll and a half of paper towels and a good bit of cursing I managed to get the spill cleaned up and got back to the situation at hand.  Since I had no tool to properly go into the fitting I had to try my hand at MacGyvering something.  Unfortunately the best I could come up with at the time some some cardboard folded and stuffed in with a small flat edge screwdriver.  Needless to say this didn’t work and I was tired of messing with it for the night.  Things were then compounded by coming in and finding my domain dead in the water.  Here is a shot of the quick disconnect where there should have been a plastic sleeve around the male portion of the fitting.

Slave Cylinder Quick Disconnect


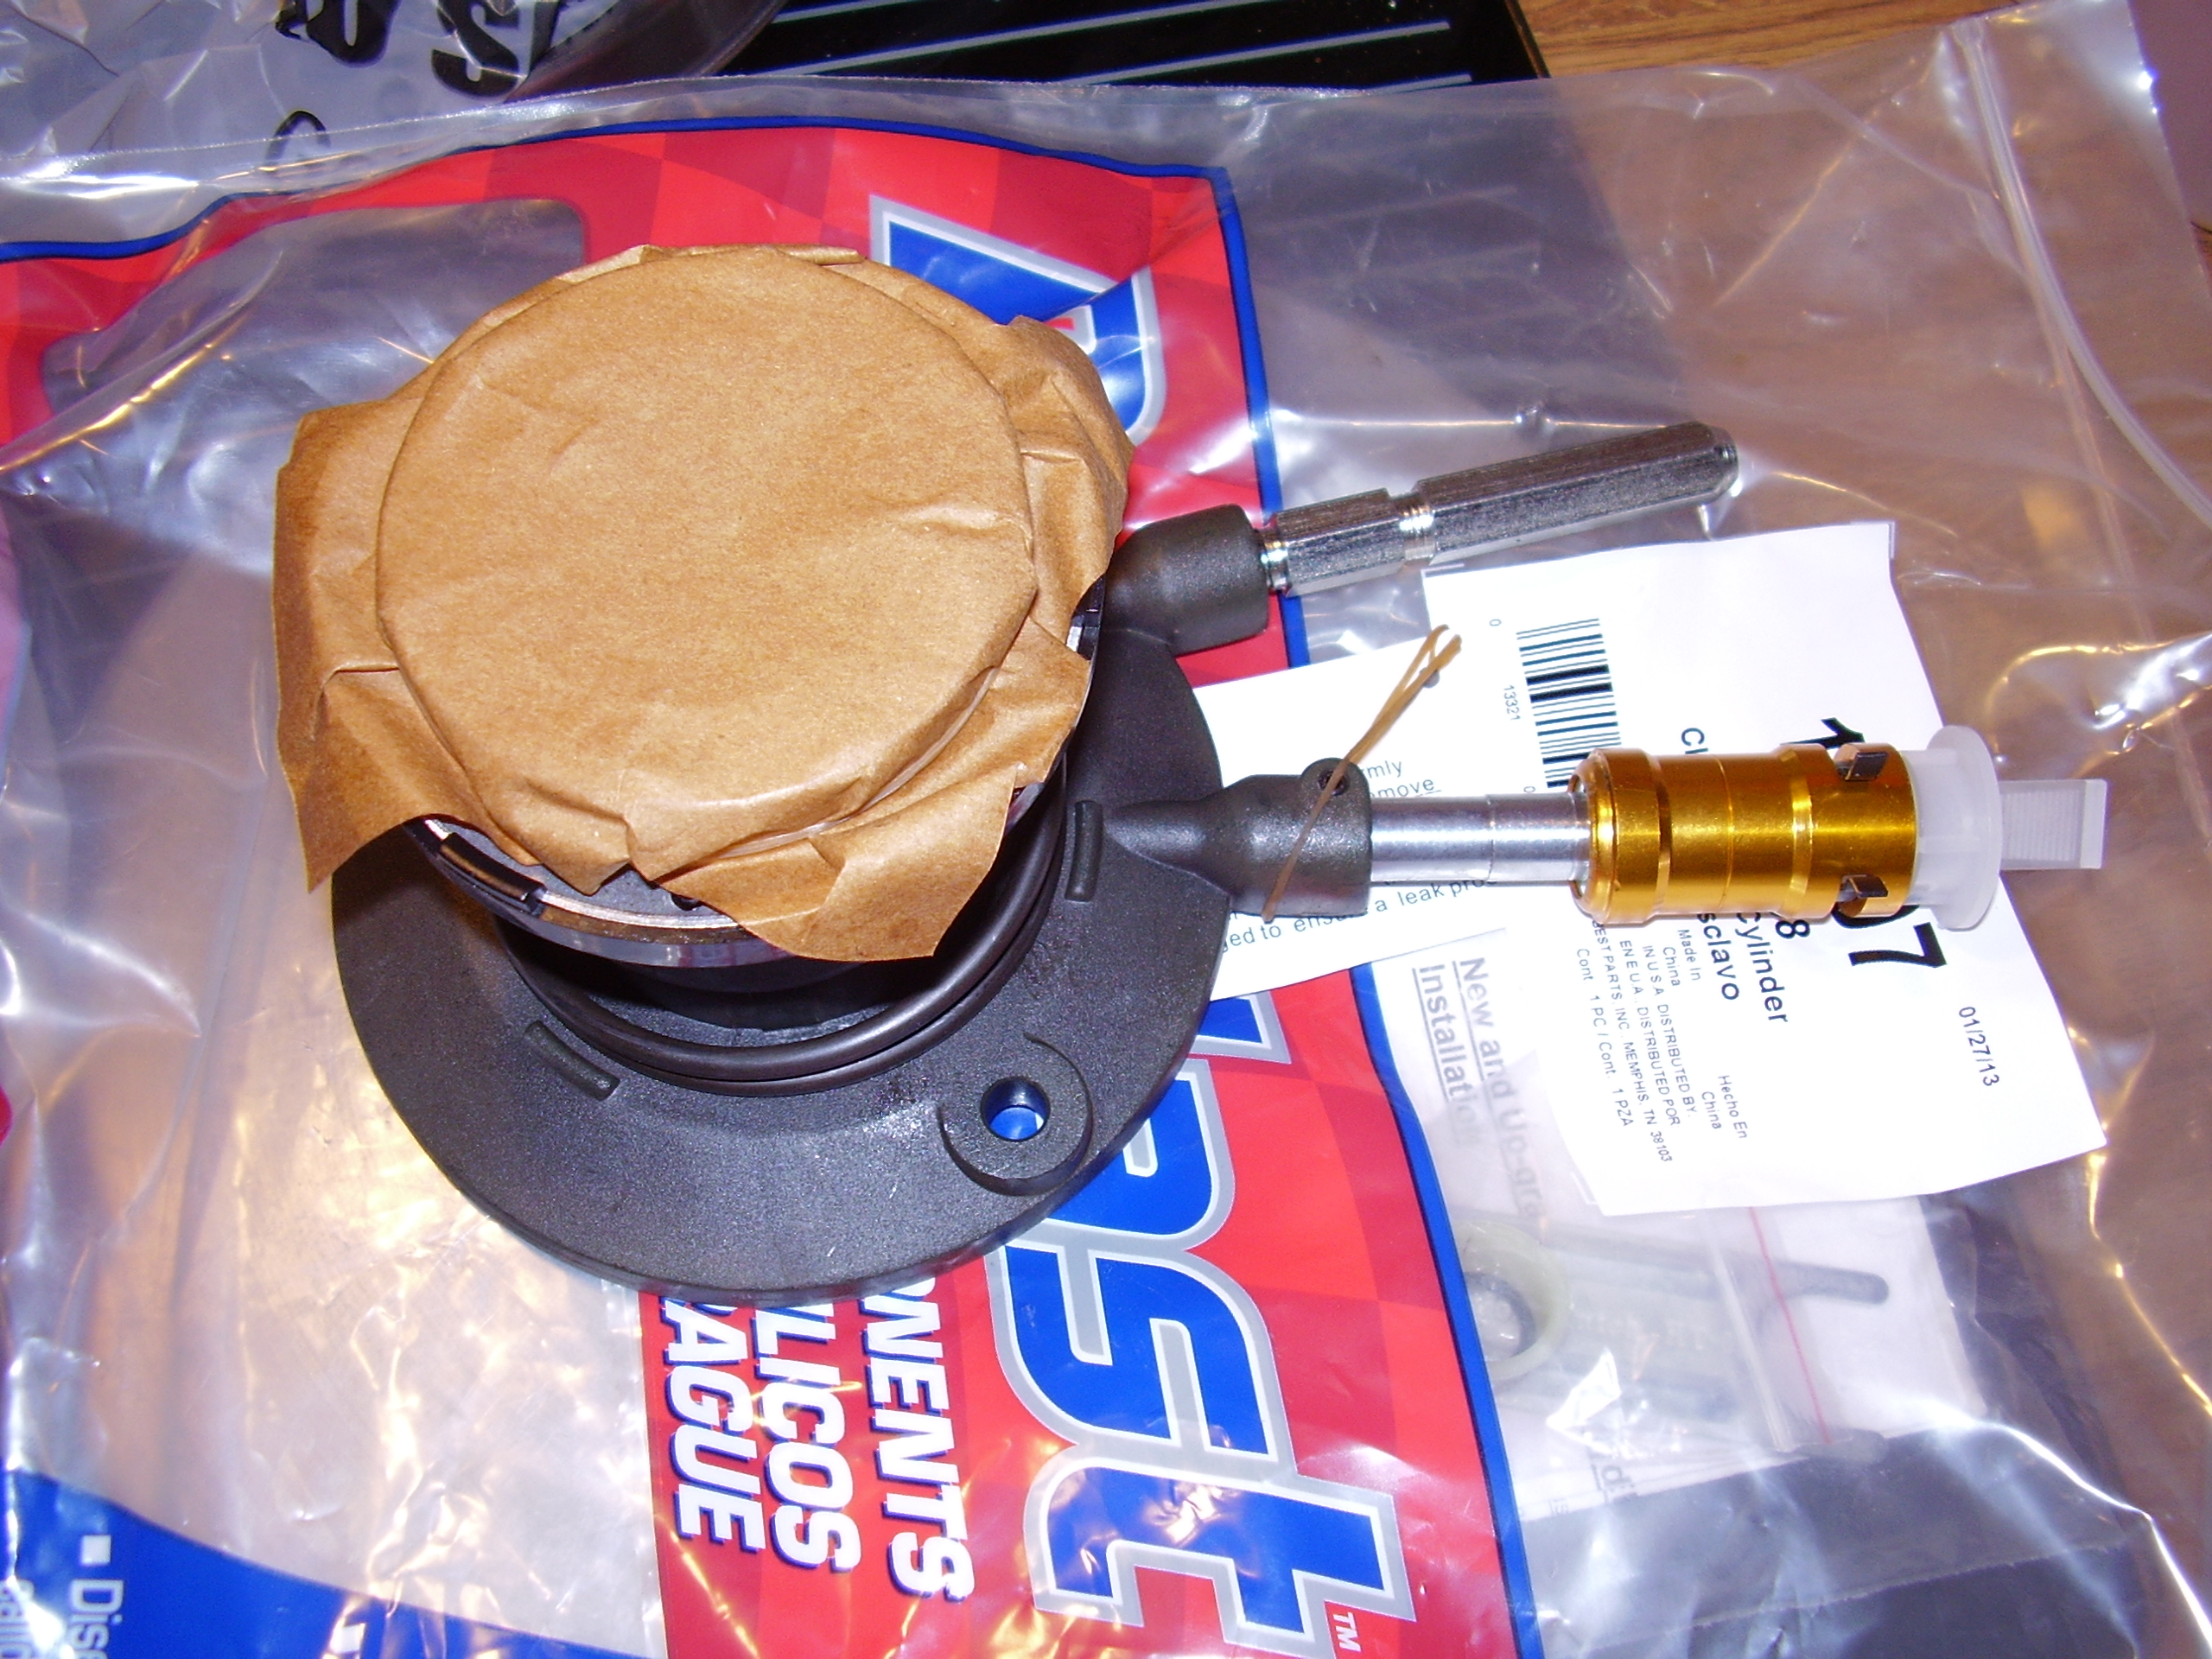
So rather than waste who knows how much more time trying to get the line separated I decided to just pick up a new slave cylinder on the way home from work tonight.  It’s a gamble getting one from the local parts places but the autozone duralast model was supposedly the same as the GM piece in some situations.  Once I got it home and opened it up, it looks like the gamble was lost and I ended up with one of the cheap china pieces that are known to be problematic.  I’m going to go ahead and throw it in for now and deal with it later if need be as it has a lifetime replacement/refund on it.  If I can ever get the other one apart I will have a spare to sit on the shelf.

New Slave Cylinder


Hopefully this weekend will go better and I’ll be able to get more done as I am ready to get this bird back on the road and driving.


New Domain

So there was a nice little charlie foxtrot with the domain I have been using to host this blog on.  Folks have been telling me for about a week now that they were only getting a list of “Related Links” rather than being able to see the normal site, however I was able to log in, view the site and post just fine.  I thought maybe it was an issue with whatever DNS services their ISP was using at the time, until last night.  I went to post a small update about the swap project I am working on and lo & behold, the domain is expired.  This is the second year in a row this particular domain of mine has done this to me.  No e-mails, call or anything.  Just flipped the switch and turned it off.  Although I am not sure why I was able to access it for a little while when the outside world couldn’t.  So I go to Registry Rocket and try to re-new it and for whatever reason their page won’t accept any payment I tried to put through, just ambiguous error messages about not being able to pre-authorize the card.  I became fed up fighting with trying to get them to take my money and give me the domain back so I just registered a new one just for the car, updated the NS and went to bed to let it propagate.

So this morning I tested it out and still no go, couldn’t resolve.  I thought that odd since most times I have had to make NS changed it was a few hours at most before I could resolve the new address.  I didn’t think too much of it since I didn’t have time to mess around with it anyway and headed off to work.  Later in the morning I tried to hit it up and bingo, the test index I stuck in there was showing up.  Tried registry rocket again and they still didn’t want my money.  Not having time to worry about someone being reluctant to take my money I went about the work day and headed home.  Once back here I tried to access the site again and no go.  The irritation started to rise once again and I grabbed the cell and was able to resolve over that network.  So I thought about it for a second and I’ve been using OpenDNS at home for a couple years now and never had an issue with them.  So as  test I went back to the comcast DNS and bam, worked like a charm.  I don’t know why OpenDNS is taking so long to propagate.

So I sit down and after a while of playing around with the database and moving some files around I was able to get the blog itself back up.  I then found a nice little plugin that did all the hard work for me by going through the DB to find and replace all the old links with the new address while keeping the serialization.  Hopefully I won’t have to deal with that again since the new domain registration is under the same place as my hosting now and they are much better with e-mail communications.  I would still like to renew the other domain to at least setup some redirects but I am not going to put too much more effort into it.

Driveline Swap in Progress – Day 2

I decided to take it easy today and just do some of the minor stuff that needed to be taken care of before the T56 gets installed.  After about 20 minutes of fighting the oil cooler lines and fill tube, I decided it wasn’t worth it to pull them out in once piece and just took the cutoff tool to them.  A mere 30 seconds later they are gone and in the trash, good riddance.

Next I removed the flexplate and set it aside with the old tranny.  At this point I figured that since I was this deep in, I might as well go ahead and change the rear main seal.  It wasn’t in terrible condition but did have a small leak at the bottom of the crank.  Afterward I installed the pilot bearing which was a bit more of a job than I expected.  Ended up having to wack on it pretty good with a washer, 1/2″ extention bar and a hammer to get it into the crank.  But once that was done, it was easy going for the clutch.  I cleaned up the flywheel with brake cleaner and bolted it in.  It was much heavier than the A4 flexplate was.  Next up was getting the friction plate in with the alignment tool and after cleaning the pressure plate contact surface with more brake cleaner it too went in.  Here is a shot of it all installed, aligned and torqued down.

Clutch Installed


I went ahead and pulled the bellhousing off the T56 but was getting a little tired at that point so I decided not to crawl under the car again for today but to do a little clean up on it instead.  Here is a before and after of the bellhousing.  It was a wee bit dusty so I attacked it with more brake cleaner and tried to get as much of the gunk off as I could.  It’s not sparkling but it does look alot better than it did before.

Dirty BellhousingCleaned Up Bellhousing


It will most likely be next weekend before I have time to mess around with it again but I’ll see how the work week goes and maybe can fit a couple hours here or there in.


Driveline Swap in Progress – Day 1

This was the first day since I took possession of the T56 and parts a couple weeks ago that I was able to actually work on the swap.  The sun was out and it got warm enough so that it was actually a pleasant day.  I would have much preferred to have been cruising around, but one step at a time.

The mailman came by and dropped off what should be the last of the parts needed to complete the project.  As you can see my dining area is just filthy with car stuff.  In this latest batch there is the torque arm relocation crossmember and short throw shifter handle from UMI Performance. Slave cylinder speed bleeder line and adjustable master cylinder from Tick Perfomance. Clutch safety switch pigtail from Rock Auto. Reverse lockout solenoid, backup lights switch and vss pigtails from EFI Connection.  It is unlikely I will need the vss as it should use the same one as the auto but better safe than sorry.  A couple brake & clutch rod retaining clips from ebay.  And finally an M20x1.5 oil plug that is remarkably hard to get ahold of that I intend to modify and use to plug the hole left when I remove the CAGS skip shift module.

More parts for the trans swap


Here is a quick shot of inside the cabin without the seats.  It sure is roomy in there with them out.  I might have to invest in the milk crate mod so that I can actually stretch my legs out.

No seats


Everything went pretty smoothly pulling the trans this time around since I knew what the skinny was on the situation having upgraded the converter only 6 months ago.  The hardest part was getting the converter bolts off since I couldn’t recall how I had secured the breaker bar hanging off the crank pulley the last time so I was stretched out with one hand on the breaker bar and one hand on the wrench at the converter bolts pushing each in the opposite direction.  I’m sure it looked quite comical.

I do think though, that it might be entirely possible that I put too much loctite on the bellhousing bolts.  During the process of removing them, I got all he-man on the ratchet and exploded one of my swivel sockets.

Broken swivel socket


After finally getting it all unbolted I pulled the 4L60E back out and stuck it next to the T56 for a side by side shot.

Transmission side by side


I’ve decided to take my time with this swap and not kill myself working super long hours on it so that everything gets done right the first time.  All said and done I’ve probably only got around 5 hours of time invested in it, half of which was me cursing at the bolts that did not want to break loose and having to go get a new swivel socket.

New Creeper and Some T-56 Goodness

So today was a happy package day with plenty of goodies arriving by various methods.  The first and foremost was a new creeper for working under the car.  For the past 3 years I’ve been using one of the cheaper HFT ones and I finally became fed up with it.

Here is a side by side shot of the old plastic HFT creeper next to the new King Crawler.  There is a night and day difference between the two.  The only thing I am likely to miss about the old one is the fact it has some tool/parts holders built in, but I doubt it’s going to bug me too much.  I’ll probably switch to just sticking my magnetic parts bowl to the underside of the car and using it to hold things for me.  As you can see the King Crawler has much larger wheels which is going to make the actual rolling around easier.  Additionally, the entire thing is cushioned and has a nice feel to it when laying down.

Creeper comparison


If you look closely at the previous shot it clearly states that the HFT creeper is supposed to hold 300lbs.  That’s just a flat out lie.  From the first day I brought it home, the bottom scrapped along the ground as you can see here.  The only way I see it not scrapping is if used by someone the size of a 12 year old boy.

Old Creeper Underside


And here you can see one of the several places the body is just cracking and beginning to break apart.

Old Creeper Breaks


All in all I think I will be pleased with the new creeper.  It has a metal frame, larger wheels, completely cushioned and still remains just an inch off the floor providing the maximum area for working on the underside of the car without sticking it three feet in the air.

The other goodies that arrived today are for the upcoming T-56 6-speed swap that I am about to dive into if I can ever get some time to work on it.  There are ARP bolts for the flywheel & pressure plate, clutch line quick disconnect tool, slave cylinder shims, clutch alignment tool and pilot bearing from Tick Performance.  A lower rubber shift boot from Hawks Third Gen.  And finally a new upper leather shift boot to match the old one I had on the A4 along with a metal retaining ring from the fine folks over at Redline Leather Goods.

T-56 Swap Parts 1


Now I just need to wait for the new crossmember, a few pigtail connectors and the master cylinder then I should be good to go.


Driveline conversion

So it has been right at 7 months since I upgraded the torque converter in the transmission and I have decided that it just isn’t for me.  Don’t get me wrong here, there is absolutely nothing wrong with a high stalled auto and they are the go to solutions if you want to run consistent times at the track.  However, mine is mostly a street car that has yet to see a track and will likely only see it once in a blue moon later on.  With it being a daily driven car I am spending a large amount of my commute times in stop & go traffic and this is where some of the problem comes from.  When running something like a 4K converter it is staying at higher RPMs for longer periods of time when unlocked and putting my mpg in the crapper.  I’ve lost somewhere on an average of 3-4 MPG since the upgrade.  Another deciding factor of this new project is that I simply miss driving a manual transmission.  Additionally it seems all the more appropriate to have a stick shift in a car of this nature.  I am sure that this is going to increase my driving enjoyment by tenfold.

I managed to get in touch with one of the local car guys in the area who offered me the perfect solution.  He is converting his M6 to an A4 and offered to sell me his transmission setup and swap some parts making this a one stop shopping trip.  The setup was pulled out of his car this week and we got together this afternoon to swap everything out.  Here is a quick shot of what I took possession of today.  Tremec T-56 6 speed transmission, RAM 88931HDX clutch with low miles, flywheel and set of M6 pedals.  He will be swinging back buy tomorrow to hand over the center console piece and shift lever.  In exchange I cannibalized part of my existing A4 setup to get him some useful pieces for his new auto configuration like the hayden fluid cooler, glowshift trans temp gauge & sending unit, A4 pedals and center console piece.

T-56 Transmission and parts


All I have to do now is wait for some other pieces on order to come in and I can begin the actual swap.  Unfortunately some of those parts won’t even ship for at least another week.  Having to walk past the new trans just sitting there doing nothing for the next couple weeks is going to be killer.