While not directly related to the bird, care of the garage’s air compressor is essential. It is, after all, the source of power for many things such as tools, filling tires, media blasting, ect. So I decided to take some time and do a little TLC on it tonight.
When I picked it up, the previous owner had already changed out the stock petcock drain valve with a 90* elbow and a couple of pipe nipples to make draining the tank easier. That is where the good ends.
I wouldn’t so much as say I purchased this compressor from the previous owner so much as I rescued it from him. The sad part is that he was only getting rid of this one because he replaced it with an exact unit for tax purposes. I feel for that new unit.
It looks like the pieces he used are galvanized. While at the bottom of the tank where sediment and water collects aren’t all that important but when there is a large air discharge it will still stir things up and possibly bring junk into the airflow when rust flakes off. When I first brought the compressor home I opened his makeshift drain and ended up with about a cup of water that was heavy with rust flakes. So I am not really sure how often he made use of the drain. But the large rust chunks indicate that water sat in the tank for a pretty good while. I try to drain the tank regularly but sometimes with the workload doing etchings it can be difficult to take a couple hours to bleed off the air, drain the water, re-pressurize the tank then let the motor cool off.
While this drain is much more convenient than the stock petcock, it was still a pain since all he did was cap the nipple off. So I had to grab the channel locks every time and twist it off. Sometimes the cap would come off, other times the long nipple pipe would come out of the elbow. None of it was sealed well. Water would weep out from pretty much every joint and stay damp.
Today I decided to take some time and fix a bit of it. I was going to just replace the entire fixture with a brass setup but I couldn’t really access the elbow to remove it due to the compressor sitting on a mini wood pallet and maneuvering tools under there was difficult. The replacement will have to wait until later as this had to be a quick patch so I could have it up and running again.
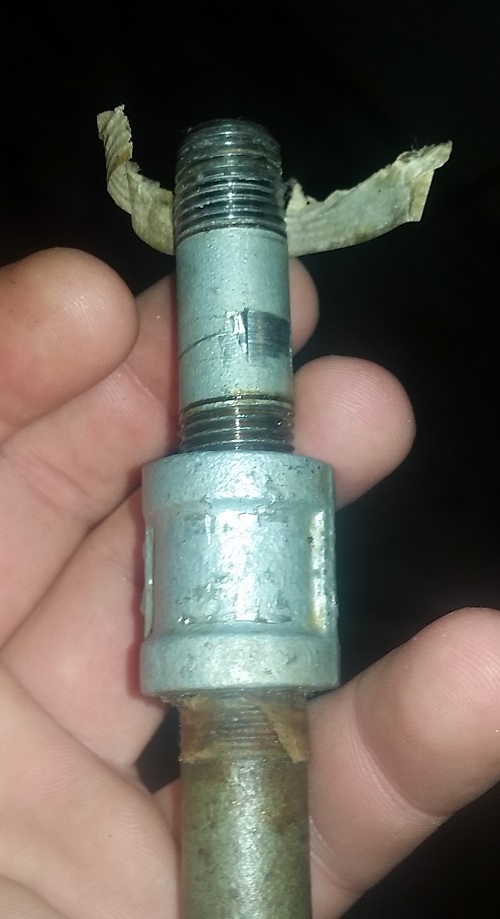
When I pulled the pipe nipples off I discovered why it had crappy sealing. This champ had used masking tape as a thread sealer, when he used sealer at all. That’s right, your run of the mill paper adhesive tape. I am sure the elbow is done the same way but there isn’t anything I can do about that at the moment.
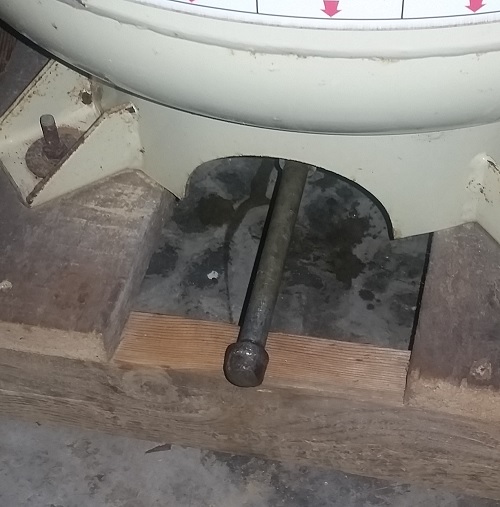
Here is the drain as I got it.
And the awesome thread sealer the winner of a previous owner used.
So I pulled all the pieces apart and there was crud built up in the pipe that looked like freaking black death. When running a wire brush through in an attempt to clean them out some it was a literal black mud that was coming out. Looking through the pipe there was evidence of corrosion all over the place. I’ll have to pull the cherry picker out of the storage shop sometime soon so I can support this heavy beast to take it off the pallet and fix this properly.
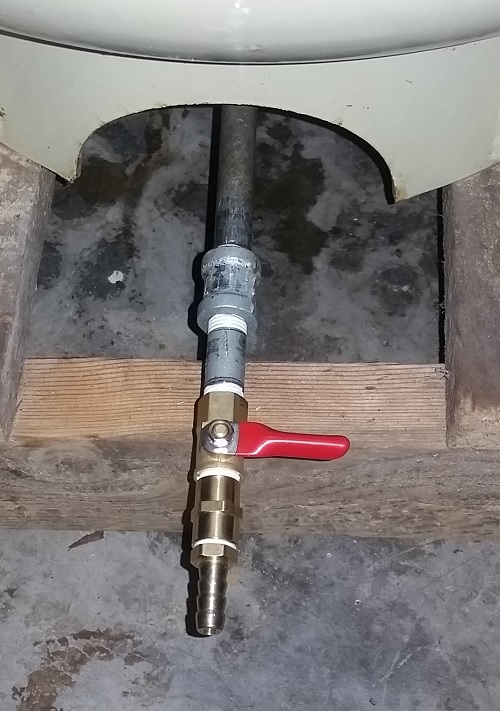
I ended up flipping the nipples around in arrangement so the longer one went to the elbow. I also made sure to put a few extra wraps of PTFE around the threads to make sure it sealed well and cranked everything down tight. I then replaced the end cap with a 1/4″ full turn ball valve and barbed fitting. This way I never have to empty the tank again, I can just open the valve and let the 150PSI push all the water and junk right out of the tank in a couple seconds instead of a feeble gravity drain. I still need to pick up some tubing to run from the barbed fitting to outside the garage so it doesn’t make a mess.
Here is the new setup as it sits now.
Now… if only I could find some time to work on any number of the car projects piling up.