So yesterday I managed to score getting off work a little early and thought that I would be able to make some progress on the swap project. As usual, I was wrong. Spent several hours working in the garage and hardly accomplished anything at all.
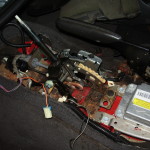
First up was getting rid of the A4 shifter assembly. Just look at that mess.
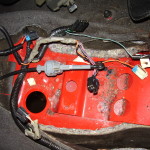
Removing it wasn’t all that bad once I figured out how the park lock cable and shifter linkage disconnected from the assembly. With it out of the way you can see the formed pedestal that it was bolted to. This has to some out as well except the air bag module also uses it as a perch. There are 6 tack welds holding it in.
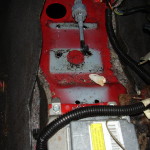
So I used a cutoff wheel and sawzall to separate most of it from the part where the air bag module bolted to. I started off drilling into the welds. And drilled, and drilled, and drilled. The bit I was using wasn’t really doing anything other than continuing to get more and more dull with only putting a small dimple into the sheet metal. I pulled it and went down to a much smaller size to start a pilot and then step drill the holes up in size until the welds were gone. Yea, that didn’t work out either since the smaller bit broke after about 3 revolutions. I guess the HFT HSS bits just weren’t up to the task. I broke out the Kobalt titanium bits, sprayed a little WD-40 and started punching holes in the steel. However my titanium bits on went up to 1/4″ and that wasn’t large enough to completely separate the welds and it was still stuck good since a prybar wouldn’t budge it. Took a trip down to Home Depot and picked up a set of cobalt bits up to 1/2″. They chewed through that steel like it wasn’t even there. I know what kind of bits I’m going to be using from this point on. Unfortunately I wasn’t able to get rid of the large grey bit in the middle there connected to a cable. That is the park lock cable and it connects to the steering column which I have no desire to pull out unless I absolutely have to. It will likely get tucked up somewhere in the dash. And here we are with the assembly mount out of the way.
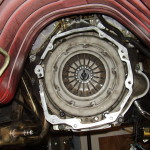
Next up is the T56 bellhousing. Got it fitted to the block and all bolted up. It is so much easier to bolt on than the 4L60E auto was since I can actually see the bolt holes and don’t need 4-5 feet of ratchet extension to reach.
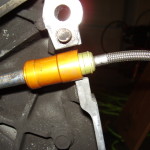
I was then going to test fit the T56 and trace out the area on the tunnel that I will need to cut out for the shifter to fit through but this is where I ran into the problems for the day. When the transmission was brought to me, the master cylinder was still connected to the slave but didn’t think much about it since I thought maybe it was done to keep it from getting misplaced. Oh nooooo, it was because whomever was the last person to mess with the clutch or it’s hydraulics left out a key piece of the quick disconnect fitting. The plastic sleeve that slides into then female portion of the quick disconnect and presses the fingers down allowing the line to come apart. I tried every A/C & fuel line quick disconnect tools I had and none would fit properly enough to get down into the fitting. So I put the T56 on the tranny jack, chained it down and lifted it into the air a little to get a better look. The next problem came when I went to tilt the tranny back some to get better light on the slave cylinder. As soon as the tailshaft was at a slight downward angle about 3 quarts of tranny fuid dumped out onto the garage floor. I don’t know about you folks, but anytime I plan to remove a trans I generally drain it first to lighten it up some and avoid extremely messy situation such as this. So after a roll and a half of paper towels and a good bit of cursing I managed to get the spill cleaned up and got back to the situation at hand. Since I had no tool to properly go into the fitting I had to try my hand at MacGyvering something. Unfortunately the best I could come up with at the time some some cardboard folded and stuffed in with a small flat edge screwdriver. Needless to say this didn’t work and I was tired of messing with it for the night. Things were then compounded by coming in and finding my domain dead in the water. Here is a shot of the quick disconnect where there should have been a plastic sleeve around the male portion of the fitting.
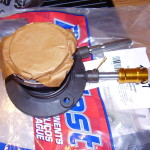
So rather than waste who knows how much more time trying to get the line separated I decided to just pick up a new slave cylinder on the way home from work tonight. It’s a gamble getting one from the local parts places but the autozone duralast model was supposedly the same as the GM piece in some situations. Once I got it home and opened it up, it looks like the gamble was lost and I ended up with one of the cheap china pieces that are known to be problematic. I’m going to go ahead and throw it in for now and deal with it later if need be as it has a lifetime replacement/refund on it. If I can ever get the other one apart I will have a spare to sit on the shelf.
Hopefully this weekend will go better and I’ll be able to get more done as I am ready to get this bird back on the road and driving.
Pingback: what did you do to your firebird today? - Page 87 - LS1TECH